ViewAnimator in Android with Example
Last Updated : 25 Feb, 2025
ViewAnimator is a very fascinating and useful feature as it switches between two or more views smoothly and mainly meant for animation features of the views on screens. It is the parent class of ViewFlipper and ViewSwitcher and the main distinction is it can switch between more than 2 views also. It is a subclass of FrameLayout Container.
Following is the way to define ViewAnimator:
<ViewAnimator
    android:id="@+id/simpleViewAnimator1"
    android:layout_width="match_parent"
    android:layout_height="wrap_content">

    ... add subviews here ...

</ViewAnimator>
Animation means apparently only one view can be active at a moment and hence there are many important methods available to make the flow smooth.
Important Methods
Methods | Description |
|---|
| showNext() | The name of the method is self-explanatory. This is used to show the next view of ViewAnimator. Only one view can be active at the moment. |
| showPrevious() | The name of the method is self-explanatory. This is used to show the previous view of ViewAnimator. Only one view can be active at the moment. |
| addView(View child) | At run time, if we want to add a view, we can use this. Add the child view at run time in the ViewAnimator. |
| setInAnimation(in) | Set the animation of the appearance of the object on the screen |
| setOutAnimation(out) | Opposite of setInAnimation(). The previous one is removed by using an animation set with the setOutAnimation() method, and then places the new one using the animation set by the setInAnimation() method. |
| getCurrentView() | Currently displayed child view of ViewAnimator. |
| getDisplayedChild() | Index for current displayed child view of ViewAnimator. |
| getInAnimation() | Current animation used to animate a View that enters the screen can be got by this method. This method returns the animation that we set using the setInAnimation() method. |
| getOutAnimation() | Current animation used to animate a View that exits the screen can be got by this method. This method returns the out animation that we set using setoutAnimation() method. |
| removeAllViews() | To remove all child views from the ViewGroup. |
| removeView(View view) | To remove the child view of ViewAnimator. We can do that bypassing the child view which we want to remove. |
| removeViewAt(int index) | If there is a requirement like to remove a view at the specified position in the group, we can use this. |
| setDisplayedChild(int whichChild) | To set the index of current displayed child view of ViewAnimator |
| setAnimateFirstView(boolean animate) | The current view should be animated the first time in the ViewAnimator can be displayed to either true or false value. |
| getAnimateFirstView() | If we have set the current view animated to true/false. |
Attributes of ViewAnimator
Attributes | Description |
|---|
| id | To uniquely identify a ViewAnimator. |
| animateFirstView | If we want to set the current view as animated, we can have this attribute |
| inAnimation | The identifier for the animation to use when a view is shown |
| outAnimation | The identifier for the animation to use when a view is hidden |
| padding | set the padding from the left, right, the top, or bottom side of a ViewAnimator. |
Step by Step Implementation
Step 1: Create a New Project
To create a new project in Android Studio please refer to How to Create/Start a New Project in Android Studio.
Note that select Kotlin as the programming language.
Step 2: Working with the activity_main.xml file
Go to the activity_main.xml file and refer to the following code. Below is the code for the activity_main.xml file.
activity_main.xml:
XML <?xml version="1.0" encoding="utf-8"?> <LinearLayout xmlns:android="http://schemas.android.com/apk/res/android" xmlns:app="http://schemas.android.com/apk/res-auto" xmlns:tools="http://schemas.android.com/tools" android:id="@+id/main" android:gravity="center" android:orientation="vertical" android:layout_width="match_parent" android:layout_height="match_parent" tools:context=".MainActivity"> <ViewAnimator android:id="@+id/simpleViewAnimator" android:layout_width="match_parent" android:layout_height="350dp"> </ViewAnimator> <Button android:id="@+id/button" android:layout_width="wrap_content" android:layout_height="wrap_content" android:layout_marginTop="32dp" android:text="Next" /> </LinearLayout>
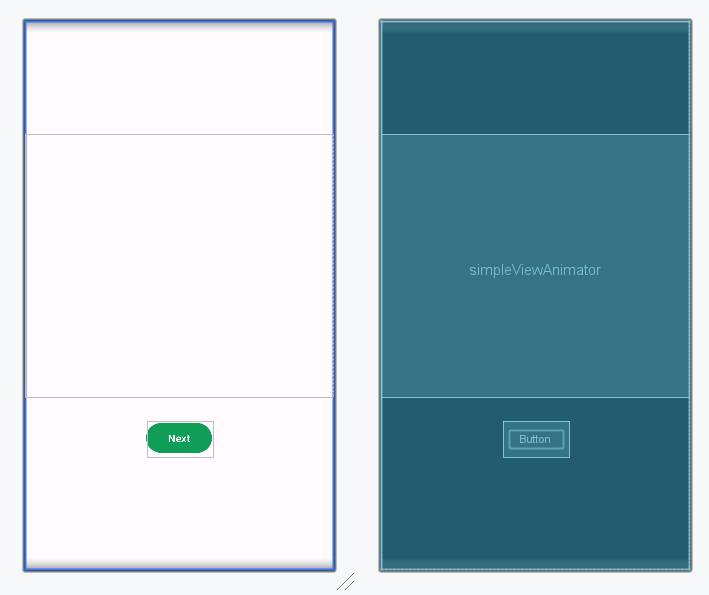
Design UI:
Step 3: Working with the MainActivity.kt file
Go to the MainActivity.kt file and refer to the following code. Below is the code for the MainActivity.kt file. Comments are added inside the code to understand the code in more detail.
MainActivity.kt:
Kotlin package org.geeksforgeeks.demo import android.os.Bundle import android.view.animation.AnimationUtils import android.widget.Button import android.widget.ImageView import android.widget.ViewAnimator import androidx.appcompat.app.AppCompatActivity class MainActivity : AppCompatActivity() { private lateinit var viewAnimator: ViewAnimator private lateinit var button: Button private var images = intArrayOf(R.drawable.k1, R.drawable.k2, R.drawable.k3, R.drawable.k4) override fun onCreate(savedInstanceState: Bundle?) { super.onCreate(savedInstanceState) setContentView(R.layout.activity_main) button = findViewById(R.id.button) viewAnimator = findViewById(R.id.simpleViewAnimator) for (i in images.indices) { // create a new object for ImageView by this way val imgView = ImageView(this) imgView.scaleType = ImageView.ScaleType.CENTER_CROP // Let us set image resource for ImageView imgView.setImageResource(images[i]) // Then add the child view in ViewAnimator viewAnimator.addView(imgView) } // Declare in and out animations and load // them using AnimationUtils class val animationIn = AnimationUtils.loadAnimation(this, android.R.anim.fade_in) val animationOut = AnimationUtils.loadAnimation(this, android.R.anim.fade_out) // set the animation type to ViewAnimator viewAnimator.inAnimation = animationIn viewAnimator.outAnimation = animationOut button.setOnClickListener { // show the next view of ViewAnimator viewAnimator.showNext() } } } Output: