Spring MVC provides a robust mechanism for handling file uploads in web applications. Using Spring MVC file upload, developers can easily integrate multipart file handling with the CommonsMultipartResolver. This article covers how to upload files in Spring MVC, configure MultipartResolver, and manage uploaded files efficiently. Whether you are working with image uploads, document storage, or handling large files, this article will help you build a Spring MVC file upload example step by step.
Pre-requisites:
- Eclipse IDE (or any other IDE of your choice)
- Apache Maven for dependency management
- Java 11 or higher
- Apache Tomcat 10 or higher (for deploying the application)
Steps to Create a Spring MVC File Uploading Project
Spring MVC framework provides support for CommonsMultipartResolver for uploading any kind of file for a web-based application. Here we will be creating a Spring MVC web application and configuring MultipartResolver to upload files (image) and also show them on the web.
Step 1: Create a Maven Web Application Project
Open Eclipse IDE and create a new Maven project. Select the maven-archetype-webapp archetype. Enter the Group Id (e.g., com.gfg) and Artifact Id (e.g., SpringMVCFileUpload). Click Finish to create the project.
Step 2: Project Structure
The project structure would look something like this:

Step 3: Add Dependencies in pom.xml
Let's start by adding some dependencies into the pom.xml already created after creating a maven project. The pom.xml defines all the dependencies that maven has to get and manage for you. We are going to add dependencies for Spring MVC, jakarta EE and file upload libraries.
pom.xml:
XML <project xmlns="http://maven.apache.org/POM/4.0.0" xmlns:xsi="http://www.w3.org/2001/XMLSchema-instance" xsi:schemaLocation="http://maven.apache.org/POM/4.0.0 http://maven.apache.org/xsd/maven-4.0.0.xsd"> <modelVersion>4.0.0</modelVersion> <groupId>com.gfg</groupId> <artifactId>SpringMVCFileUpload</artifactId> <version>0.0.1-SNAPSHOT</version> <packaging>war</packaging> <name>SpringMVCFileUpload Maven Webapp</name> <url>http://www.example.com</url> <properties> <project.build.sourceEncoding>UTF-8</project.build.sourceEncoding> <maven.compiler.source>11</maven.compiler.source> <maven.compiler.target>11</maven.compiler.target> </properties> <dependencies> <!-- Spring MVC --> <dependency> <groupId>org.springframework</groupId> <artifactId>spring-webmvc</artifactId> <version>5.3.23</version> </dependency> <!-- Jakarta Servlet API --> <dependency> <groupId>jakarta.servlet</groupId> <artifactId>jakarta.servlet-api</artifactId> <version>5.0.0</version> <scope>provided</scope> </dependency> <!-- Jakarta JSTL --> <dependency> <groupId>jakarta.servlet.jsp.jstl</groupId> <artifactId>jakarta.servlet.jsp.jstl-api</artifactId> <version>2.0.0</version> </dependency> <!-- Apache Commons FileUpload --> <dependency> <groupId>commons-fileupload</groupId> <artifactId>commons-fileupload</artifactId> <version>1.5</version> </dependency> <!-- Apache Commons IO --> <dependency> <groupId>commons-io</groupId> <artifactId>commons-io</artifactId> <version>2.11.0</version> </dependency> <!-- JUnit for Testing --> <dependency> <groupId>junit</groupId> <artifactId>junit</artifactId> <version>4.13.2</version> <scope>test</scope> </dependency> </dependencies> <build> <finalName>SpringMVCFileUpload</finalName> <plugins> <plugin> <groupId>org.apache.maven.plugins</groupId> <artifactId>maven-compiler-plugin</artifactId> <version>3.8.1</version> <configuration> <source>11</source> <target>11</target> </configuration> </plugin> <plugin> <groupId>org.apache.maven.plugins</groupId> <artifactId>maven-war-plugin</artifactId> <version>3.3.1</version> </plugin> </plugins> </build> </project>
Step 4: Configure web.xml
The web.xml file in the WEB-INF folder defines mapping with different URLs and servlets to handle requests for those URLs. In this configuration file, we have used Jakarta EE namespace and configure the DispatcherServlet.
web.xml:
XML <web-app xmlns="https://jakarta.ee/xml/ns/jakartaee" xmlns:xsi="http://www.w3.org/2001/XMLSchema-instance" xsi:schemaLocation="https://jakarta.ee/xml/ns/jakartaee https://jakarta.ee/xml/ns/jakartaee/web-app_5_0.xsd" version="5.0"> <display-name>Spring MVC File Upload</display-name> <servlet> <servlet-name>gfg</servlet-name> <servlet-class> org.springframework.web.servlet.DispatcherServlet </servlet-class> <init-param> <param-name>contextConfigLocation</param-name> <param-value>/WEB-INF/gfg-servlet.xml</param-value> </init-param> <load-on-startup>1</load-on-startup> </servlet> <servlet-mapping> <servlet-name>gfg</servlet-name> <url-pattern>/</url-pattern> </servlet-mapping> </web-app>
Step 5: Configure gfg-servlet.xml
This is the gfg-servlet.xml file located in "/src/main/webapp/WEB-INF/gfg.servlet.xml". This file handles all HTTP requests for web applications. The annotation-driven enable the spring @Controller function, resource-mapping helps in handling HTTP requests for all resources. The bean configuration helps in identifying and scanning the jsp located in the views folder. The component-scan locates and allocated beans according to the mentioned annotation. Also added a resource mapping to map all the resources to the view a page.
gfg-servlet.xml:
A bean with id as multipartResolver will help in instantiating the CommonsMultipartResolver.
XML <beans xmlns="http://www.springframework.org/schema/beans" xmlns:context="http://www.springframework.org/schema/context" xmlns:mvc="http://www.springframework.org/schema/mvc" xmlns:xsi="http://www.w3.org/2001/XMLSchema-instance" xsi:schemaLocation="http://www.springframework.org/schema/beans http://www.springframework.org/schema/beans/spring-beans.xsd http://www.springframework.org/schema/mvc http://www.springframework.org/schema/mvc/spring-mvc.xsd http://www.springframework.org/schema/context http://www.springframework.org/schema/context/spring-context.xsd"> <context:component-scan base-package="com.gfg" /> <mvc:resources mapping="/resources/**" location="/WEB-INF/resources/" cache-period="31556926"/> <mvc:annotation-driven /> <bean class="org.springframework.web.servlet.view.InternalResourceViewResolver" name="viewResolver"> <property name="prefix" value="/WEB-INF/views/" /> <property name="suffix" value=".jsp" /> </bean> <!-- Configure MultipartResolver for file uploads --> <bean id="multipartResolver" class="org.springframework.web.multipart.commons.CommonsMultipartResolver" /> </beans>
Step 6: Create the Controller
The UploadFileController class in the com.gfg.controller has was methods for two requests to be mapped. The upload method is a get mapping and simple redirects to the fileform.jsp view page. The fileUpload method sends a Post request and redirects the showupload page. This class has three parameters CommonsMultipartFile gets the uploaded file. The file is converted into a bytes array and saved into a file using FileOutputStream, the model param is used to add the file name as an attribute in the showupload.jsp file.
UploadFileController:
Java package com.gfg.controller; import java.io.File; import java.io.FileOutputStream; import javax.servlet.http.HttpSession; import org.springframework.stereotype.Controller; import org.springframework.ui.Model; import org.springframework.web.bind.annotation.GetMapping; import org.springframework.web.bind.annotation.PostMapping; import org.springframework.web.bind.annotation.RequestParam; import org.springframework.web.multipart.commons.CommonsMultipartFile; @Controller public class UploadFileController { @GetMapping("/upload") public String upload() { return "fileform"; } @PostMapping("/uploadfile") public String fileUpload(@RequestParam("thisfile") CommonsMultipartFile file, HttpSession session, Model model) { byte[] data = file.getBytes(); String filePath = session.getServletContext().getRealPath("/") + "WEB-INF" + File.separator + "resources" + File.separator + "image" + File.separator + file.getOriginalFilename(); try (FileOutputStream fileout = new FileOutputStream(filePath)) { fileout.write(data); model.addAttribute("imgName", file.getOriginalFilename()); } catch (Exception e) { e.printStackTrace(); } return "showupload"; } }
Step 7: Create JSP Views
The fileform.jsp in the views folder defines the upload form with enctype as multipart/form-data. We've used bootstrap for the proper styling of the page.
fileform.jsp:
HTML <!doctype html> <html lang="en"> <head> <!-- Required meta tags --> <meta charset="utf-8"> <meta name="viewport" content="width=device-width, initial-scale=1, shrink-to-fit=no"> <!-- Bootstrap CSS --> <link rel="stylesheet" href="https://cdn.jsdelivr.net/npm/[email protected]/dist/css/bootstrap.min.css" integrity="sha384-ggOyR0iXCbMQv3Xipma34MD+dH/1fQ784/j6cY/iJTQUOhcWr7x9JvoRxT2MZw1T" crossorigin="anonymous"> <title>File uploader</title> </head> <body> <h1>Upload File</h1> <form action="uploadfile" method="post" enctype="multipart/form-data"> <div class="form-group"> <label for="formFile" class="form-label">Upload Your file</label> <input name="thisfile" class="form-control" type="file" id="formFile"> </div> <button class="btn btn-secondary">Upload</button> </form> <!-- Optional JavaScript --> <!-- jQuery first, then Popper.js, then Bootstrap JS --> <script src="https://code.jquery.com/jquery-3.3.1.slim.min.js" integrity="sha384-q8i/X+965DzO0rT7abK41JStQIAqVgRVzpbzo5smXKp4YfRvH+8abtTE1Pi6jizo" crossorigin="anonymous"></script> <script src="https://cdn.jsdelivr.net/npm/[email protected]/dist/umd/popper.min.js" integrity="sha384-UO2eT0CpHqdSJQ6hJty5KVphtPhzWj9WO1clHTMGa3JDZwrnQq4sF86dIHNDz0W1" crossorigin="anonymous"></script> <script src="https://cdn.jsdelivr.net/npm/[email protected]/dist/js/bootstrap.min.js" integrity="sha384-JjSmVgyd0p3pXB1rRibZUAYoIIy6OrQ6VrjIEaFf/nJGzIxFDsf4x0xIM+B07jRM" crossorigin="anonymous"></script> </body> </html>
The showupload.jsp page displays the uploaded image using jsp to map the image URL.
showupload.jsp:
HTML <%@ page language="java" contentType="text/html; charset=UTF-8" pageEncoding="UTF-8"%> <%@ taglib prefix="c" uri="http://java.sun.com/jsp/jstl/core" %> <!DOCTYPE html> <html> <head> <meta charset="UTF-8"> <title>Insert title here</title> </head> <body> <h1>File Uploaded</h1> <img src="<c:url value="resources/image/${imgName}"/>"/> </body> </html> Note: After adding all the classes and configuration file, the project structure should look something like this:

Note: Before running the application, you need to manually create a folder named image inside the WEB-INF/resources directory. This folder will be used to store the uploaded files (e.g., images). If the folder does not exist, the application will throw an error when trying to save the uploaded file.
Step 8: Run the Application
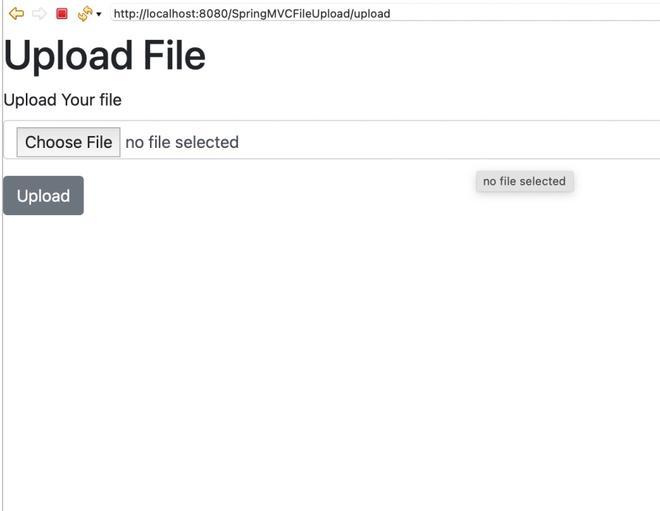
Now it's time to run your project, start the Tomcat Server and run your application, now type "http://localhost:8080/SpringMVCFileUpload/upload" in any browser.
Output:
The below image demonstrates a file upload form in a Spring MVC application where users can select and upload a file.

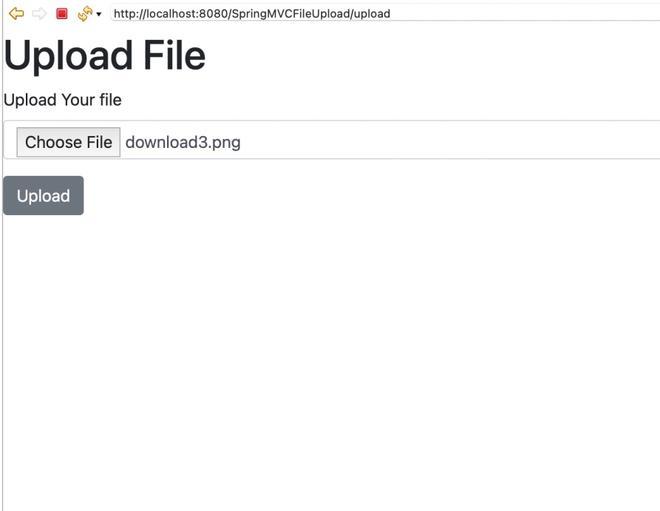
Upload the image and click on upload this will redirect you to the showupload page

Now, you will see your uploaded image.

So we have created a Spring MVC web application with an upload form and displayed the uploaded image on the web.
Similar Reads
Spring MVC @ModelAttribute Annotation with Example In Spring MVC, the @ModelAttribute annotation binds a method parameter or method return value to a named model attribute and then exposes it to a web view. It refers to the property of the Model object. For example, if we have a form with a form backing object that is called "Student" then we can ha
8 min read
Data Transfer Object (DTO) in Spring MVC with Example In Spring Framework, Data Transfer Object (DTO) is an object that carries data between processes. When you're working with a remote interface, each call is expensive. As a result, you need to reduce the number of calls. The solution is to create a Data Transfer Object that can hold all the data for
7 min read
Spring MVC - Capture and Display the Data from Registration Form This article is the continuation of this article Spring MVC - Create Registration Form using Form Tag Library, where we have successfully created a registration form using the Form Tag Library. Here in this article, we are going to explain how can we capture the data that are entered by the user and
3 min read
Spring MVC - Create Registration Form using Form Tag Library Spring Framework provides spring’s form tag library for JSP views in Spring’s Web MVC framework. In Spring Framework, we use Java Server Pages(JSP) as a view component to interact with the user. From version 2.0, Spring Framework provides a comprehensive set of data binding-aware tags. These tags ar
7 min read
Data Binding in Spring MVC with Example Data Binding, as the name itself, is a self-explanatory word. In data binding what we have to do is we have to capture or store the data so that we can bind that data with another resource (for example displaying the data in the frontend part) as per our needs or we can also read the data from a var
8 min read
Spring MVC - Pagination with Example We will be explaining how we can implement pagination in Spring MVC Application. This is required when we need to show a lot of data on pages. Suppose in an e-commerce site we have a lot of products but we can't show all of those on a single page, so we will show only 20 products on each page. This
3 min read
Spring MVC Integration with MySQL Spring MVC is one of the most popular Java frameworks for building scalable web applications. When combined with MySQL, it provides a robust solution for developing data-driven applications. This article will guide you through integrating Spring MVC with MySQL, covering database setup, project confi
7 min read
OpenSource REST API URL and Retrieving Data From it By Using Spring MVC In this internet era, a lot of helper services are available in the form of REST API and mostly REST API provides us the details in the form of JSON/XML. We can use them in our applications and render the data as we like. Here is the list of a few opensource REST API URLs: API NameDescriptionURLCoin
6 min read
How to Resolve WEB xml is missing and failOnMissingWebXml is set to true in Eclipse/STS? Eclipse/STS IDE is generally used to develop Spring applications and what happens is whenever we are creating a simple Maven project and if the web.xml is missing or you have deleted that file then you may encounter this problem inside the pom.xml file corresponding to which do refer to the below im
2 min read
Spring MVC Application Without web.xml File Spring MVC framework enables separation of modules namely Model, View, and Controller, and seamlessly handles the application integration. This enables the developer to create complex applications also using plain java classes. Here we will be creating and running Your First Spring MVC Application,
4 min read