Spring Boot with H2 Database
Last Updated : 18 Mar, 2025
H2 Database in Spring Boot is an embedded, open-source, and in-memory database. It is a relational database management system written in Java. It is a client/server application. It stores data in memory, not persist the data on disk. Here we will be discussing how can we configure and perform some basic operations in Spring Boot using the H2 Database.
In this article, we will explore how to integrate the H2 Database with Spring Boot. H2 is a lightweight, in-memory database that simplifies development and testing. We'll cover the configuration, key features, and basic CRUD operations to enhance your Spring Boot applications efficiently.
What is H2 Database?
H2 is a lightweight and fast SQL database written in Java. It can run in two modes: in-memory and embedded. The in-memory mode is particularly useful for testing and development because it allows you to create a temporary database that is automatically destroyed when the application stops. The embedded mode is used for applications that need a small, self-contained database.
Features of the H2 Database:
- Very fast, open-source, JDBC API
- Embedded and server modes; disk-based or in-memory databases.
- Transaction support, multi-version concurrency
- Browser-based Console application
- Encrypted databases
- Fulltext search
- Pure Java with a small footprint: around 2.5 MB jar file size
- ODBC driver
Configure H2 Database in Spring Boot Application
Below are the steps to set up H2 database in Spring Boot application.
Step 1: Adding the dependency
To use the H2 database in the spring boot application we have to add the following dependency in the pom.xml file:
h2 and spring-boot-starter-data-jpa dependencies:
<dependency>
      <groupId>org.springframework.boot</groupId>
      <artifactId>spring-boot-starter-data-jpa</artifactId>
</dependency>
<dependency>
      <groupId>com.h2database</groupId>
      <artifactId>h2</artifactId>
      <scope>runtime</scope>
 </dependency>
Step 2: Configure Application Properties
Configure the H2 database in the application.properties file:
# H2 Database
spring.h2.console.enabled=true
spring.datasource.url=jdbc:h2:mem:dcbapp
spring.datasource.driver-class-name=org.h2.Driver
spring.datasource.username=sa
spring.datasource.password=password
spring.jpa.database-platform=org.hibernate.dialect.H2Dialect
We can also use YAML file for database configuration by adding properties to application.yml file as depicted below:
spring:
    h2:
         console.enabled: true
    datasource:
         url: jdbc:h2:mem:dcbapp
         driver-class-name: org.h2.Driver
         username: sa
         password: password
     jpa:
         spring.jpa.database-platform: org.hibernate.dialect.H2Dialect
Let's understand what these properties are by opening the H2 Database console.
Accessing the H2 Console
By default, the console view of the H2 database is disabled. Before accessing the H2 database, we must enable it by using the following property:
spring.h2.console.enabled=true
Once we have enabled the H2 console, now we can access the H2 console in the browser by invoking the URL http://localhost:8082/h2-console .
Note : Provide your port number in which your spring application is running
The following figure shows the console view of the H2 database.

Using H2 Database to perform CRUD Operation in Spring Boot
We are going to perform some basic CRUD Operations by creating a Spring Boot Application and using the H2 Database.
Step 1: Create a Spring Boot Project
Refer to this article How to Create a Spring Boot Project with IntelliJ IDEA and create a Spring Boot project.
Step 2: Add the following dependency
- Spring Web
- H2 Database
- Lombok
- Spring Data JPA
Below is the complete code for the pom.xml file. Please check if you have missed something.
pom.xml:
XML <?xml version="1.0" encoding="UTF-8"?> <project xmlns="http://maven.apache.org/POM/4.0.0" xmlns:xsi="http://www.w3.org/2001/XMLSchema-instance" xsi:schemaLocation="http://maven.apache.org/POM/4.0.0 https://maven.apache.org/xsd/maven-4.0.0.xsd"> <modelVersion>4.0.0</modelVersion> <parent> <groupId>org.springframework.boot</groupId> <artifactId>spring-boot-starter-parent</artifactId> <version>2.5.5</version> <relativePath/> <!-- lookup parent from repository --> </parent> <groupId>com.amiya</groupId> <artifactId>Spring-Boot-Demo-Project</artifactId> <version>1.0.0-SNAPSHOT</version> <name>Spring-Boot-Demo-Project</name> <description>Demo project for Spring Boot</description> <properties> <java.version>11</java.version> </properties> <dependencies> <dependency> <groupId>org.springframework.boot</groupId> <artifactId>spring-boot-starter-web</artifactId> </dependency> <dependency> <groupId>com.h2database</groupId> <artifactId>h2</artifactId> <scope>runtime</scope> </dependency> <dependency> <groupId>org.springframework.boot</groupId> <artifactId>spring-boot-devtools</artifactId> <scope>runtime</scope> <optional>true</optional> </dependency> <dependency> <groupId>org.springframework.boot</groupId> <artifactId>spring-boot-starter-data-jpa</artifactId> </dependency> <dependency> <groupId>org.springframework.boot</groupId> <artifactId>spring-boot-starter-test</artifactId> <scope>test</scope> </dependency> <dependency> <groupId>org.projectlombok</groupId> <artifactId>lombok</artifactId> <optional>true</optional> </dependency> </dependencies> <build> <plugins> <plugin> <groupId>org.springframework.boot</groupId> <artifactId>spring-boot-maven-plugin</artifactId> <configuration> <excludes> <exclude> <groupId>org.projectlombok</groupId> <artifactId>lombok</artifactId> </exclude> </excludes> </configuration> </plugin> </plugins> </build> </project>
Step 3: Create Classes
Create 4 packages and later create some classes and interfaces inside these packages as seen in the below image
- entity
- repository
- service
- controller

Note:
- Green Rounded Icon 'I' Buttons are Interface.
- Blue Rounded Icon 'C' Buttons are Classes.
Step 4: Entity Class
Create a simple POJO class inside the Department.java file.
Department.java:
Java // Java Program to Demonstrate Department File // Importing required package modules package com.amiya.springbootdemoproject.entity; // Importing required classes (using jakarta.persistence now) import jakarta.persistence.Entity; import jakarta.persistence.GeneratedValue; import jakarta.persistence.GenerationType; import jakarta.persistence.Id; import lombok.AllArgsConstructor; import lombok.Builder; import lombok.Data; import lombok.NoArgsConstructor; @Entity @Data @NoArgsConstructor @AllArgsConstructor @Builder // Class public class Department { @Id @GeneratedValue(strategy = GenerationType.AUTO) private Long departmentId; private String departmentName; private String departmentAddress; private String departmentCode; }
Step 5: Create Repository
Create a simple interface and name the interface as DepartmentRepository. This interface is going to extend the CrudRepository as we have discussed above.
Example: Below is the code for the DepartmentRepository.java file.
Java package com.amiya.springbootdemoproject.repository; import com.amiya.springbootdemoproject.entity.Department; import org.springframework.data.repository.CrudRepository; import org.springframework.stereotype.Repository; // Annotation @Repository // Interface extending CrudRepository public interface DepartmentRepository extends CrudRepository<Department, Long> { }
Step 6: Create a Service Class
Inside the package create one interface named as DepartmentService and one class named as DepartmentServiceImpl.
Example 1-A:
Java // Java Program to Demonstrate DepartmentService File // Importing required package modules package com.amiya.springbootdemoproject.service; import com.amiya.springbootdemoproject.entity.Department; // Importing required classes import java.util.List; // Interface public interface DepartmentService { // Save operation Department saveDepartment(Department department); // Read operation List<Department> fetchDepartmentList(); // Update operation Department updateDepartment(Department department, Long departmentId); // Delete operation void deleteDepartmentById(Long departmentId); }
Example 1-B:
Java // Java Program to Demonstrate DepartmentServiceImpl.java // File // Importing required package modules package com.amiya.springbootdemoproject.service; import com.amiya.springbootdemoproject.entity.Department; import com.amiya.springbootdemoproject.repository.DepartmentRepository; import java.util.List; import java.util.Objects; import org.springframework.beans.factory.annotation.Autowired; import org.springframework.stereotype.Service; // Annotation @Service // Class public class DepartmentServiceImpl implements DepartmentService { @Autowired private DepartmentRepository departmentRepository; // Save operation @Override public Department saveDepartment(Department department) { return departmentRepository.save(department); } // Read operation @Override public List<Department> fetchDepartmentList() { return (List<Department>) departmentRepository.findAll(); } // Update operation @Override public Department updateDepartment(Department department, Long departmentId) { Department depDB = departmentRepository.findById(departmentId) .get(); if (Objects.nonNull(department.getDepartmentName()) && !"".equalsIgnoreCase( department.getDepartmentName())) { depDB.setDepartmentName( department.getDepartmentName()); } if (Objects.nonNull( department.getDepartmentAddress()) && !"".equalsIgnoreCase( department.getDepartmentAddress())) { depDB.setDepartmentAddress( department.getDepartmentAddress()); } if (Objects.nonNull(department.getDepartmentCode()) && !"".equalsIgnoreCase( department.getDepartmentCode())) { depDB.setDepartmentCode( department.getDepartmentCode()); } return departmentRepository.save(depDB); } // Delete operation @Override public void deleteDepartmentById(Long departmentId) { departmentRepository.deleteById(departmentId); } }
Step 7: Create Controller
Inside the package create one class named as DepartmentController.
Java // java Program to Illustrate DepartmentController File // Importing required packages modules package com.amiya.springbootdemoproject.controller; import com.amiya.springbootdemoproject.entity.Department; import com.amiya.springbootdemoproject.service.DepartmentService; import java.util.List; // Importing required classes import jakarta.validation.Valid; import org.springframework.beans.factory.annotation.Autowired; import org.springframework.web.bind.annotation.*; // Annotation @RestController // Class public class DepartmentController { @Autowired private DepartmentService departmentService; // Save operation @PostMapping("/departments") public Department saveDepartment( @Valid @RequestBody Department department) { return departmentService.saveDepartment(department); } // Read operation @GetMapping("/departments") public List<Department> fetchDepartmentList() { return departmentService.fetchDepartmentList(); } // Update operation @PutMapping("/departments/{id}") public Department updateDepartment(@RequestBody Department department, @PathVariable("id") Long departmentId) { return departmentService.updateDepartment( department, departmentId); } // Delete operation @DeleteMapping("/departments/{id}") public String deleteDepartmentById(@PathVariable("id") Long departmentId) { departmentService.deleteDepartmentById( departmentId); return "Deleted Successfully"; } } Accessing H2 Database
Below are the properties for the application.properties file.
server.port = 8082

# H2 Database
spring.h2.console.enabled=true
spring.datasource.url=jdbc:h2:mem:dcbapp
spring.datasource.driverClassName=org.h2.Driver
spring.datasource.username=sa
spring.datasource.password=password
spring.jpa.database-platform=org.hibernate.dialect.H2Dialect
For application.yml file:
spring:
    h2:
        console.enabled=true
    datasource:
        url: jdbc:h2:mem:dcbapp
        driverClassName: org.h2.Driver
        username: sa
        password: password
    jpa:
        spring.jpa.database-platform: org.hibernate.dialect.H2Dialect
Now run your application and let's test the endpoints in Postman and also refer to our H2 Database.
Testing the Endpoint in Postman
Endpoint 1: POST - http://localhost:8082/departments/
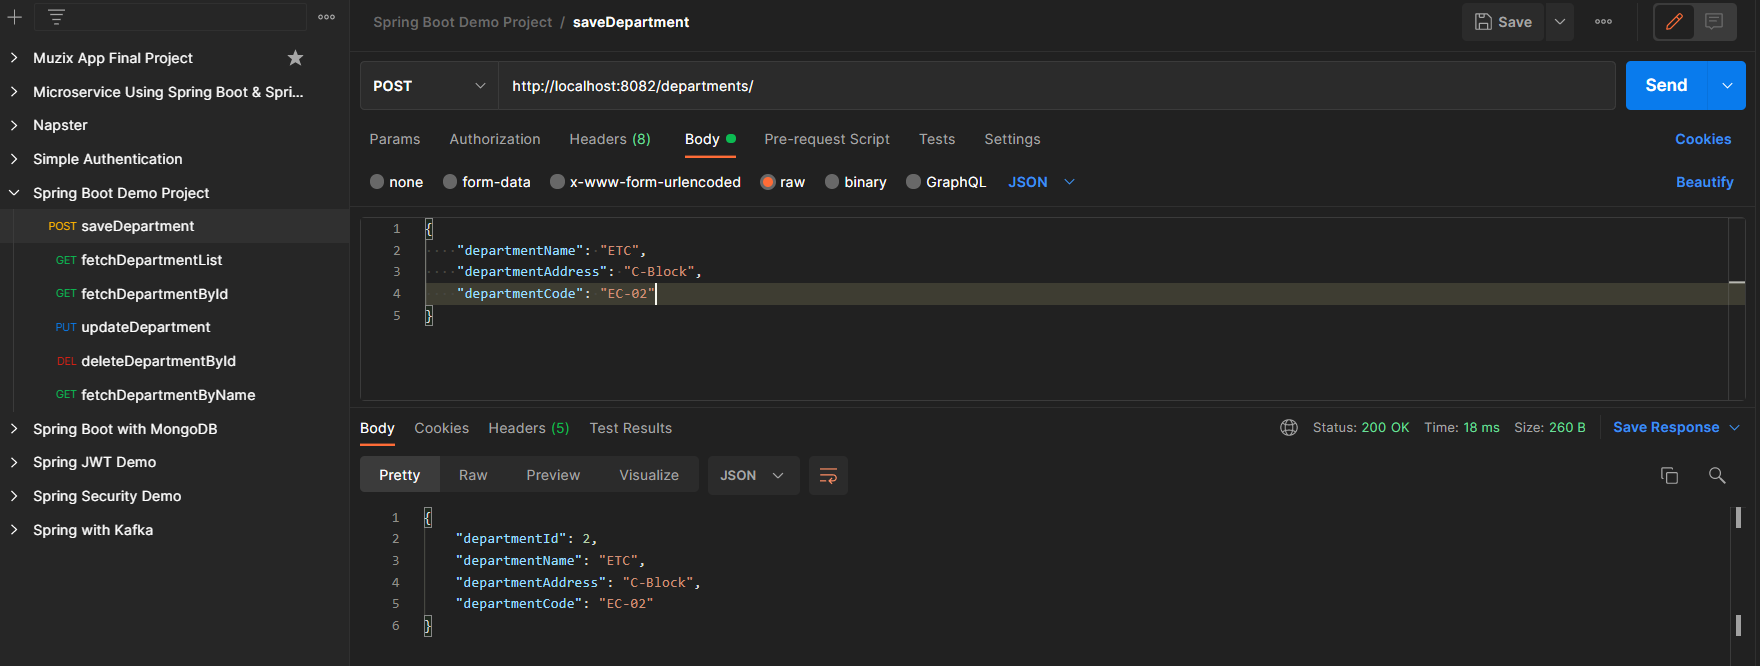
Endpoint 2: GET - http://localhost:8082/departments/

Endpoint 3: PUT - http://localhost:8082/departments/1

Endpoint 4: DELETE - http://localhost:8082/departments/1
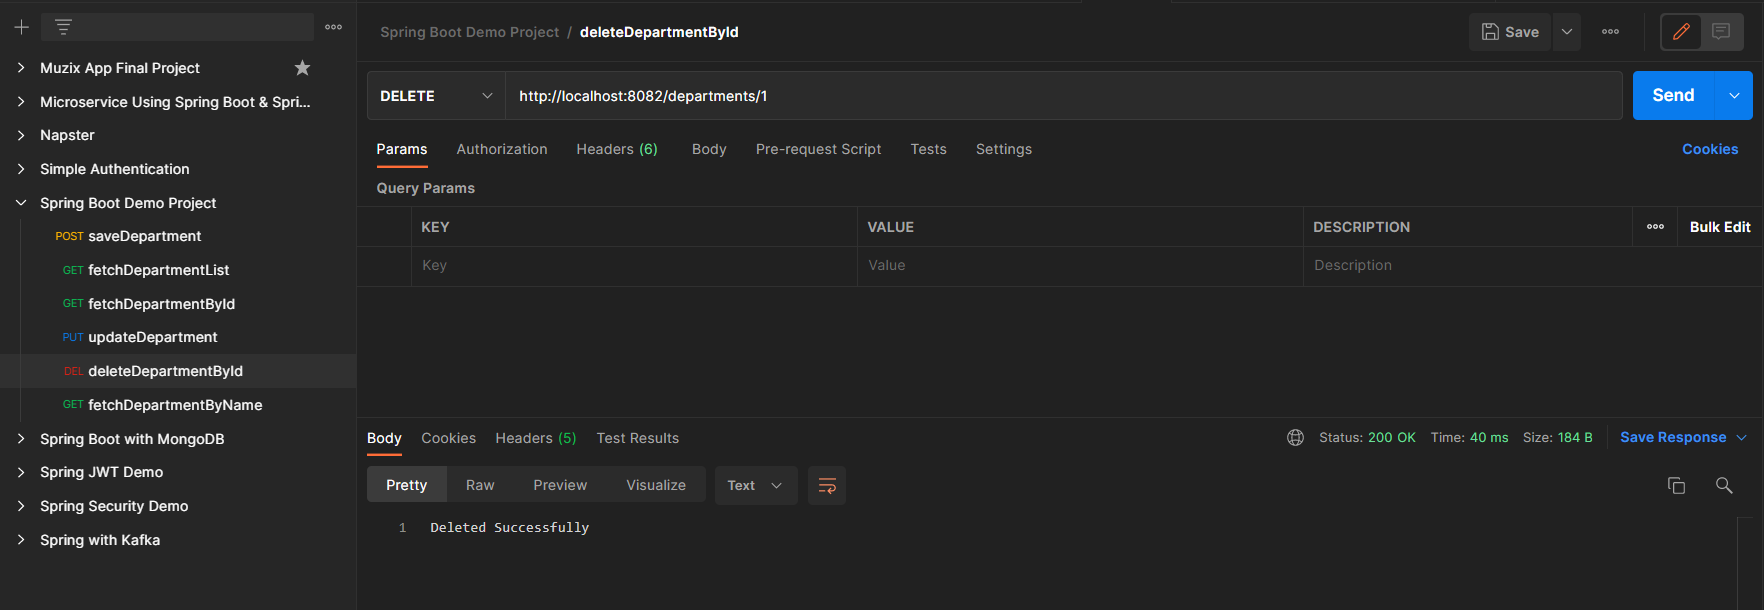
Lastly, H2 Database is as depicted in the below media as follows:

Conclusion
In this article, we have learned how to configure, access H2 Database and how to test endpoints in Postman for managing the running database.
Similar Reads
Spring Boot - Integrating Hibernate and JPA Spring Boot is built on the top of the spring and contains all the features of spring. And is becoming a favorite of developers these days because of its rapid production-ready environment which enables the developers to directly focus on the logic instead of struggling with the configuration and se
3 min read
Spring Boot JpaRepository with Example Spring Boot is built on the top of the spring and contains all the features of spring. And is becoming a favorite of developers these days because of its rapid production-ready environment which enables the developers to directly focus on the logic instead of struggling with the configuration and se
9 min read
Spring Boot - CRUD Operations using MongoDB CRUD stands for Create, Read/Retrieve, Update, and Delete and these are the four basic operations that we perform on persistence storage. CRUD is data-oriented and the standardized use of HTTP methods. HTTP has a few methods which work as CRUD operations and do note they are very vital from a develo
5 min read
Spring Boot - Spring Data JPA Spring Data JPA or JPA stands for Java Persistence API, so before looking into that, we must know about ORM (Object Relation Mapping). So Object relation mapping is simply the process of persisting any java object directly into a database table. Usually, the name of the object being persisted become
6 min read
Upload Multiple Files in Spring Boot using JPA, Thymeleaf, Multipart Spring Boot is built on the top of the spring and contains all the features of spring. And is becoming a favorite of developers these days because of its rapid production-ready environment which enables the developers to directly focus on the logic instead of struggling with the configuration and se
8 min read
Spring Boot - Difference Between CrudRepository and JpaRepository Spring Boot is built on the top of the spring and contains all the features of spring. And is becoming a favorite of developers these days because of its rapid production-ready environment which enables the developers to directly focus on the logic instead of struggling with the configuration and se
3 min read
Spring Boot - CrudRepository with Example Spring Boot is built on the top of the spring and contains all the features of spring. And is becoming a favorite of developers these days because of its rapid production-ready environment which enables the developers to directly focus on the logic instead of struggling with the configuration and se
6 min read
Spring Boot - application.yml/application.yaml File Spring is widely used for creating scalable applications. For web applications Spring provides. In Spring Boot, whenever we create a new Spring Boot Application in spring starter, or inside an IDE (Eclipse or STS) a file is located inside the src/main/resources folder named as application.properties
4 min read
Spring Boot - CRUD Operations using MySQL Database CRUD stands for Create, Read/Retrieve, Update and Delete and these are the four basic operations that we perform on persistence storage. CRUD is data-oriented and the standardized use of HTTP methods. HTTP has a few methods which work as CRUD operations and do note they are very vital from a develop
7 min read
How to Implement One to Many Mapping in Spring Boot? Spring Boot is built on the top of the spring and contains all the features of spring. Spring also provides JPA and hibernate to increase the data manipulation efficiency between the spring application and the database. In very simple terms we can say JPA (Java persistence API) is like an interface
3 min read