Skip to content
geeksforgeeks
  • Courses
    • DSA to Development
    • Get IBM Certification
    • Newly Launched!
      • Master Django Framework
      • Become AWS Certified
    • For Working Professionals
      • Interview 101: DSA & System Design
      • Data Science Training Program
      • JAVA Backend Development (Live)
      • DevOps Engineering (LIVE)
      • Data Structures & Algorithms in Python
    • For Students
      • Placement Preparation Course
      • Data Science (Live)
      • Data Structure & Algorithm-Self Paced (C++/JAVA)
      • Master Competitive Programming (Live)
      • Full Stack Development with React & Node JS (Live)
    • Full Stack Development
    • Data Science Program
    • All Courses
  • Tutorials
    • Data Structures & Algorithms
    • ML & Data Science
    • Interview Corner
    • Programming Languages
    • Web Development
    • CS Subjects
    • DevOps And Linux
    • School Learning
  • Practice
    • Build your AI Agent
    • GfG 160
    • Problem of the Day
    • Practice Coding Problems
    • GfG SDE Sheet
  • Contests
    • Accenture Hackathon (Ending Soon!)
    • GfG Weekly [Rated Contest]
    • Job-A-Thon Hiring Challenge
    • All Contests and Events
  • Data Science
  • Data Science Projects
  • Data Analysis
  • Data Visualization
  • Machine Learning
  • ML Projects
  • Deep Learning
  • NLP
  • Computer Vision
  • Artificial Intelligence
Open In App
Next Article:
ML | Implement Face recognition using k-NN with scikit-learn
Next article icon

ML | Face Recognition Using PCA Implementation

Last Updated : 30 Nov, 2021
Comments
Improve
Suggest changes
Like Article
Like
Report

Face Recognition is one of the most popular and controversial tasks of computer vision. One of the most important milestones is achieved using This approach was first developed by Sirovich and Kirby in 1987 and first used by Turk and Alex Pentland in face classification in 1991. It is easy to implement and thus used in many early face recognition applications. But it has some caveats such as this algorithm required cropped face images with proper light and pose for training. In this article, we will be discussing the implementation of this method in python and sklearn. 
We need to first import the scikit-learn library for using the PCA function API that is provided into this library. 
The scikit-learn library also provided an API to fetch LFW_peoples dataset. We also required matplotlib to plot faces.
Code: Importing libraries 
 

Python3


# Import matplotlib library
import matplotlib.pyplot as plt
 
# Import scikit-learn library
from sklearn.model_selection import train_test_split
from sklearn.model_selection import GridSearchCV
from sklearn.datasets import fetch_lfw_people
from sklearn.metrics import classification_report
from sklearn.metrics import confusion_matrix
from sklearn.decomposition import PCA
from sklearn.svm import SVC
 
import numpy as np


Now we import the LFW_people dataset using sklearn’s fetch_lfw_people function API. LFW_prople is the preprocess excerpt of LFW. It contains 13233 images of 5749 classes of shape 125 * 94. This function provides an parameter min_faces_per_person. This parameter allows us to select the classes that have at least min_faces_per_person different pictures. This function also has a parameter resize which resize every image in the extracted face. We use min_faces_per_person = 70 and resize = 0.4. 
Code: 
 

Python3


# this command will download the LFW_people's dataset to hard disk.
lfw_people = fetch_lfw_people(min_faces_per_person = 70, resize = 0.4)
 
# introspect the images arrays to find the shapes (for plotting)
n_samples, h, w = lfw_people.images.shape
 
# Instead of providing 2D data, X has data already in the form  of a vector that
# is required in this approach.
X = lfw_people.data
n_features = X.shape[1]
 
# the label to predict is the id of the person
y = lfw_people.target
target_names = lfw_people.target_names
n_classes = target_names.shape[0]
 
# Print Details about dataset
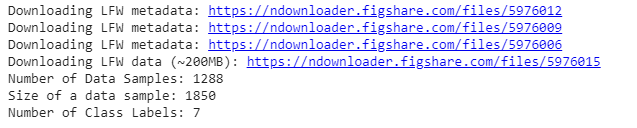
print("Number of Data Samples: % d" % n_samples)
print("Size of a data sample: % d" % n_features)
print("Number of Class Labels: % d" % n_classes)


Output:
 

dataset details output

Code: Data Exploration
 

Python3


# Function to plot images in 3 * 4 
def plot_gallery(images, titles, h, w, n_row = 3, n_col = 4):
    plt.figure(figsize =(1.8 * n_col, 2.4 * n_row))
    plt.subplots_adjust(bottom = 0, left =.01, right =.99, top =.90, hspace =.35)
    for i in range(n_row * n_col):
        plt.subplot(n_row, n_col, i + 1)
        plt.imshow(images[i].reshape((h, w)), cmap = plt.cm.gray)
        plt.title(titles[i], size = 12)
        plt.xticks(())
        plt.yticks(())
 
# Generate true labels above the images
def true_title(Y, target_names, i):
    true_name = target_names[Y[i]].rsplit(' ', 1)[-1]
    return 'true label:   % s' % (true_name)
 
true_titles = [true_title(y, target_names, i)
                     for i in range(y.shape[0])]
plot_gallery(X, true_titles, h, w)


dataset_image

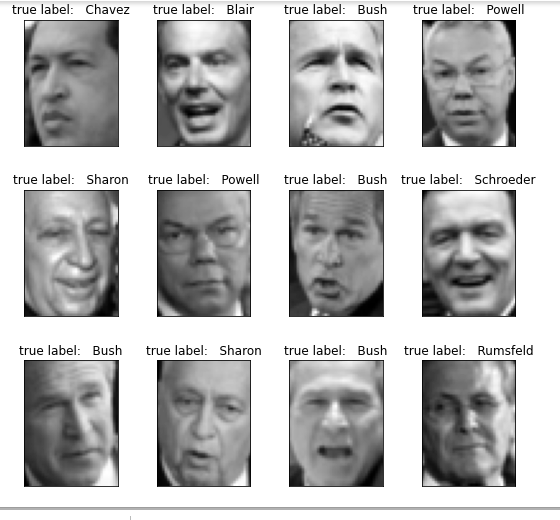
Dataset Sample Images with True Labels

Now, we apply train_test_split to split the data into training and testing sets. We use 25% of the data for testing. 
Code: Splitting the dataset 
 

Python3


X_train, X_test, y_train, y_test = train_test_split(
    X, y, test_size = 0.25, random_state = 42)
print("size of training Data is % d and Testing Data is % d" %(
        y_train.shape[0], y_test.shape[0]))


train test-size

Now, we apply the PCA algorithm on the training dataset which computes EigenFaces. Here, we take n_components = 150 means we extract the top 150 Eigenfaces from the algorithm. We also print the time taken to apply this algorithm. 
Code: Implementing PCA 
 

Python3


n_components = 150
 
t0 = time()
pca = PCA(n_components = n_components, svd_solver ='randomized',
          whiten = True).fit(X_train)
print("done in % 0.3fs" % (time() - t0))
 
eigenfaces = pca.components_.reshape((n_components, h, w))
 
print("Projecting the input data on the eigenfaces orthonormal basis")
t0 = time()
X_train_pca = pca.transform(X_train)
X_test_pca = pca.transform(X_test)
print("done in % 0.3fs" % (time() - t0))


PCA output

The above code generates the EigenFace and each image is represented by a vector of size 1 * 150. The values in this vector represent the coefficient corresponding to that Eigenface. These coefficient are generated using transform function on the function.
Eigenfaces generated by this PCA algorithm: 
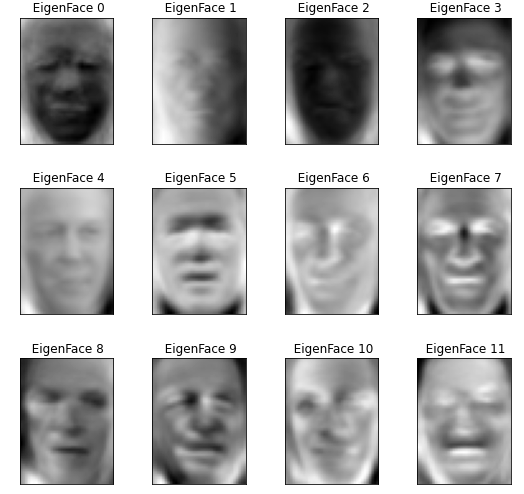
 

eigenfaces

EigenFaces

Code: Explore the coefficient generated by the above algorithm. 
 

Python3


print("Sample Data point after applying PCA\n", X_train_pca[0])
print("-----------------------------------------------------")
print("Dimensions of training set = % s and Test Set = % s"%(
        X_train.shape, X_test.shape))
 
 
Sample Data point after applying PCA  [-2.0756025  -1.0457923   2.126936    0.03682641 -0.7575693  -0.51736575   0.8555038   1.0519465   0.45772424  0.01348036 -0.03962574  0.63872665   0.4816719   2.337867    1.7784412   0.13310494 -2.271292   -4.4569106   2.0977738  -1.1379385   0.1884598  -0.33499134  1.1254574  -0.32403082   0.14094219  1.0769527   0.7588098  -0.09976506  3.1199582   0.8837879  -0.893391    1.1595601   1.430711    1.685587    1.3434631  -1.2590996  -0.639135   -2.336333   -0.01364169 -1.463893   -0.46878636 -1.0548446  -1.3329269   1.1364135   2.2223723  -1.801526   -0.3064784  -1.0281631   4.7735424   3.4598463   1.9261417  -1.3513585  -0.2590924   2.010101  -1.056406    0.36097565  1.1712595   0.75685936  0.90112156  0.59933555  -0.46541685  2.0979452   1.3457304   1.9343662   5.068155   -0.70603204   0.6064072  -0.89698195 -0.21625179 -2.1058862  -1.6839983  -0.19965973  -1.7508434  -3.0504303   2.051207    0.39461815  0.12691127  1.2121526  -0.79466134 -1.3895757  -2.0269105  -2.791953    1.4810398   0.1946961   0.26118103 -0.1208623   1.1642501   0.80152154  1.2733462   0.09606536  -0.98096275  0.31221238  1.0365396   0.8510516   0.5742255  -0.49945745  -1.3462409  -1.036648   -0.4910289   1.0547347   1.2205439  -1.3073852  -1.1884091   1.8626214   0.6881952   1.8356183  -1.6419449   0.57973146   1.3768481  -1.8154184   2.0562973  -0.14337398  1.3765801  -1.4830858  -0.0109648   2.245713    1.6913172   0.73172116  1.0212364  -0.09626482   0.38742945 -1.8325268   0.8476424  -0.33258602 -0.96296996  0.57641584  -1.1661777  -0.4716097   0.5479076   0.16398667  0.2818301  -0.83848953  -1.1516216  -1.0798892  -0.58455086 -0.40767965 -0.67279476 -0.9364346   0.62396616  0.9837545   0.1692572   0.90677387 -0.12059807  0.6222619  -0.32074842 -1.5255395   1.3164424   0.42598936  1.2535237   0.11011053] ----------------------------------------------------- Dimensions of training set (966, 1850) and Test Set (322, 1850)

Now we use Support Vector Machine (SVM) as our classification algorithm. We train the data using the PCA coefficient generated in previous steps. 
Code: Applying Grid Search Algorithm 
 

Python3


print("Fitting the classifier to the training set")
t0 = time()
param_grid = {'C': [1e3, 5e3, 1e4, 5e4, 1e5],
              'gamma': [0.0001, 0.0005, 0.001, 0.005, 0.01, 0.1], }
clf = GridSearchCV(
    SVC(kernel ='rbf', class_weight ='balanced'), param_grid
)
clf = clf.fit(X_train_pca, y_train)
print("done in % 0.3fs" % (time() - t0))
print("Best estimator found by grid search:")
print(clf.best_estimator_)
 
print("Predicting people's names on the test set")
t0 = time()
y_pred = clf.predict(X_test_pca)
print("done in % 0.3fs" % (time() - t0))
# print classification results
print(classification_report(y_test, y_pred, target_names = target_names))
# print confusion matrix
print("Confusion Matrix is:")
print(confusion_matrix(y_test, y_pred, labels = range(n_classes)))
 
 
Fitting the classifier to the training set done in 45.872s Best estimator found by grid search: SVC(C=1000.0, break_ties=False, cache_size=200, class_weight='balanced',     coef0=0.0, decision_function_shape='ovr', degree=3, gamma=0.005,     kernel='rbf', max_iter=-1, probability=False, random_state=None,     shrinking=True, tol=0.001, verbose=False) Predicting people's names on the test set done in 0.076s                    precision    recall  f1-score   support       Ariel Sharon       0.75      0.46      0.57        13      Colin Powell       0.79      0.87      0.83        60   Donald Rumsfeld       0.89      0.63      0.74        27     George W Bush       0.84      0.98      0.90       146 Gerhard Schroeder       0.95      0.80      0.87        25       Hugo Chavez       1.00      0.47      0.64        15        Tony Blair       0.97      0.81      0.88        36           accuracy                           0.85       322         macro avg       0.88      0.72      0.77       322      weighted avg       0.86      0.85      0.84       322  Confusion Matrix is : [[  6   3   0   4   0   0   0]  [  1  52   1   6   0   0   0]  [  1   2  17   7   0   0   0]  [  0   3   0 143   0   0   0]  [  0   1   0   3  20   0   1]  [  0   3   0   4   1   7   0]  [  0   2   1   4   0   0  29]]

So, our accuracy is 0.85 and Results of our prediction are: 
 

Reference: 
 

  • Scikit-learn Eigenface Implementation


Next Article
ML | Implement Face recognition using k-NN with scikit-learn

P

pawangfg
Improve
Article Tags :
  • AI-ML-DS
  • Machine Learning
  • AI-ML-DS With Python
Practice Tags :
  • Machine Learning

Similar Reads

  • ML | Implement Face recognition using k-NN with scikit-learn
    k-Nearest Neighbors: k-NN is one of the most basic classification algorithms in machine learning. It belongs to the supervised learning category of machine learning. k-NN is often used in search applications where you are looking for “similar” items. The way we measure similarity is by creating a ve
    5 min read
  • ML | Face Recognition Using Eigenfaces (PCA Algorithm)
    In 1991, Turk and Pentland suggested an approach to face recognition that uses dimensionality reduction and linear algebra concepts to recognize faces. This approach is computationally less expensive and easy to implement and thus used in various applications at that time such as handwritten recogni
    4 min read
  • Emojify using Face Recognition with Machine Learning
    In this article, we will learn how to implement a modification app that will show an emoji of expression which resembles the expression on your face. This is a fun project based on computer vision in which we use an image classification model in reality to classify different expressions of a person.
    7 min read
  • Face recognition using Artificial Intelligence
    The current technology amazes people with amazing innovations that not only make life simple but also bearable. Face recognition has over time proven to be the least intrusive and fastest form of biometric verification. The software uses deep learning algorithms to compare a live captured image to t
    15+ min read
  • Implementation of KNN using OpenCV
    KNN is one of the most widely used classification algorithms that is used in machine learning. To know more about the KNN algorithm read here KNN algorithm Today we are going to see how we can implement this algorithm in OpenCV and how we can visualize the results in 2D plane showing different featu
    3 min read
  • Phoneme Recognition using Machine Learning
    Phoneme recognition in Natural Language Processing (NLP) is a main component in developing speech recognition systems. Phonemes are the smallest sound units in a language that can distinguish one word from another. Recognising these phonemes accurately is important for converting spoken language int
    7 min read
  • Applications of Pattern Recognition
    Pattern recognition is the ability of a system to identify patterns and regularities in data by analyzing information. It helps systems to classify, cluster and interpret complex datasets, making it useful in fields like computer vision, healthcare, security and automation. In this article, we will
    4 min read
  • Implementation of K-Nearest Neighbors from Scratch using Python
    Instance-Based LearningK Nearest Neighbors Classification is one of the classification techniques based on instance-based learning. Models based on instance-based learning to generalize beyond the training examples. To do so, they store the training examples first. When it encounters a new instance
    8 min read
  • Automatic Number Plate Recognition System using EasyOCR
    Automatic License/Number Plate Recognition (ANPR) is the process of detecting position of number plate and then using Optical Character Recognition technique to identify the text on the plate from a image or video. It is widely used in video surveillance and for security purposes. In this article, w
    6 min read
  • Python - Facial and hand recognition using MediaPipe Holistic
    What is MediaPipe:   Object Detection is one of the leading and most popular use cases in the domain of computer vision. Several object detection models are used worldwide for their particular use case applications. Many of these models have been used as an independent solution to a single computer
    4 min read
geeksforgeeks-footer-logo
Corporate & Communications Address:
A-143, 7th Floor, Sovereign Corporate Tower, Sector- 136, Noida, Uttar Pradesh (201305)
Registered Address:
K 061, Tower K, Gulshan Vivante Apartment, Sector 137, Noida, Gautam Buddh Nagar, Uttar Pradesh, 201305
GFG App on Play Store GFG App on App Store
Advertise with us
  • Company
  • About Us
  • Legal
  • Privacy Policy
  • In Media
  • Contact Us
  • Advertise with us
  • GFG Corporate Solution
  • Placement Training Program
  • Languages
  • Python
  • Java
  • C++
  • PHP
  • GoLang
  • SQL
  • R Language
  • Android Tutorial
  • Tutorials Archive
  • DSA
  • Data Structures
  • Algorithms
  • DSA for Beginners
  • Basic DSA Problems
  • DSA Roadmap
  • Top 100 DSA Interview Problems
  • DSA Roadmap by Sandeep Jain
  • All Cheat Sheets
  • Data Science & ML
  • Data Science With Python
  • Data Science For Beginner
  • Machine Learning
  • ML Maths
  • Data Visualisation
  • Pandas
  • NumPy
  • NLP
  • Deep Learning
  • Web Technologies
  • HTML
  • CSS
  • JavaScript
  • TypeScript
  • ReactJS
  • NextJS
  • Bootstrap
  • Web Design
  • Python Tutorial
  • Python Programming Examples
  • Python Projects
  • Python Tkinter
  • Python Web Scraping
  • OpenCV Tutorial
  • Python Interview Question
  • Django
  • Computer Science
  • Operating Systems
  • Computer Network
  • Database Management System
  • Software Engineering
  • Digital Logic Design
  • Engineering Maths
  • Software Development
  • Software Testing
  • DevOps
  • Git
  • Linux
  • AWS
  • Docker
  • Kubernetes
  • Azure
  • GCP
  • DevOps Roadmap
  • System Design
  • High Level Design
  • Low Level Design
  • UML Diagrams
  • Interview Guide
  • Design Patterns
  • OOAD
  • System Design Bootcamp
  • Interview Questions
  • Inteview Preparation
  • Competitive Programming
  • Top DS or Algo for CP
  • Company-Wise Recruitment Process
  • Company-Wise Preparation
  • Aptitude Preparation
  • Puzzles
  • School Subjects
  • Mathematics
  • Physics
  • Chemistry
  • Biology
  • Social Science
  • English Grammar
  • Commerce
  • World GK
  • GeeksforGeeks Videos
  • DSA
  • Python
  • Java
  • C++
  • Web Development
  • Data Science
  • CS Subjects
@GeeksforGeeks, Sanchhaya Education Private Limited, All rights reserved
We use cookies to ensure you have the best browsing experience on our website. By using our site, you acknowledge that you have read and understood our Cookie Policy & Privacy Policy
Lightbox
Improvement
Suggest Changes
Help us improve. Share your suggestions to enhance the article. Contribute your expertise and make a difference in the GeeksforGeeks portal.
geeksforgeeks-suggest-icon
Create Improvement
Enhance the article with your expertise. Contribute to the GeeksforGeeks community and help create better learning resources for all.
geeksforgeeks-improvement-icon
Suggest Changes
min 4 words, max Words Limit:1000

Thank You!

Your suggestions are valuable to us.

What kind of Experience do you want to share?

Interview Experiences
Admission Experiences
Career Journeys
Work Experiences
Campus Experiences
Competitive Exam Experiences