Skip to content
geeksforgeeks
  • Tutorials
    • Python
    • Java
    • Data Structures & Algorithms
    • ML & Data Science
    • Interview Corner
    • Programming Languages
    • Web Development
    • CS Subjects
    • DevOps And Linux
    • School Learning
    • Practice Coding Problems
  • Courses
    • DSA to Development
    • Get IBM Certification
    • Newly Launched!
      • Master Django Framework
      • Become AWS Certified
    • For Working Professionals
      • Interview 101: DSA & System Design
      • Data Science Training Program
      • JAVA Backend Development (Live)
      • DevOps Engineering (LIVE)
      • Data Structures & Algorithms in Python
    • For Students
      • Placement Preparation Course
      • Data Science (Live)
      • Data Structure & Algorithm-Self Paced (C++/JAVA)
      • Master Competitive Programming (Live)
      • Full Stack Development with React & Node JS (Live)
    • Full Stack Development
    • Data Science Program
    • All Courses
  • Java for Android
  • Android Studio
  • Android Kotlin
  • Kotlin
  • Flutter
  • Dart
  • Android Project
  • Android Interview
Open In App
Next Article:
How to create customized Buttons in Android with different shapes and colors
Next article icon

How to create customized Buttons in Android with different shapes and colors

Last Updated : 19 Feb, 2021
Comments
Improve
Suggest changes
Like Article
Like
Report
A Button is a user interface that are used to perform some action when clicked or tapped.
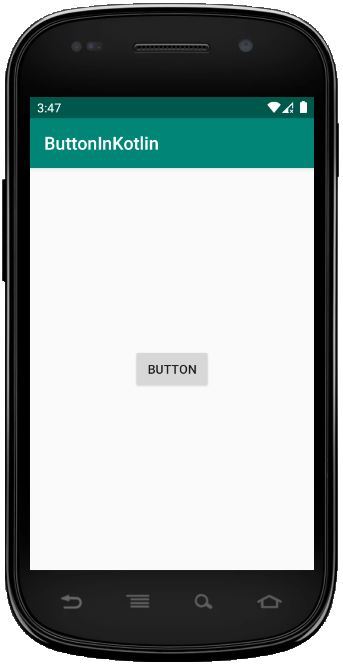
Default Shape of Button
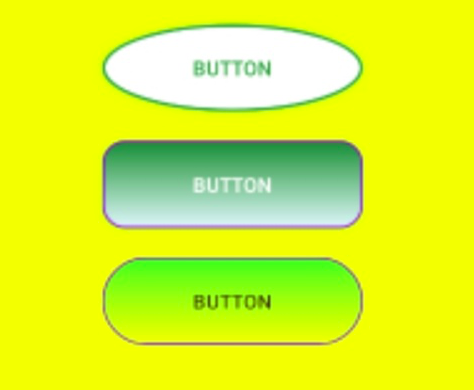
In this article, we will try to change the shape and color of Button to various designs, like:
  • Oval Button
  • Rectangular Button
  • Cylindrical Button

Approach:

Below are the various steps to created customized Buttons: Step 1: Start a new Android Studio project Please refer to this article to see in detail about how to create a new Android Studio project. Step 2: Add the Button Since we only need to customize Buttons, we will just add Buttons in our layout. We don't need any other widget. This can be done either by writing the code in XML or using the Design Tab. Here, we will do so by adding its XML code. Now since we need to customize the Button as per 3 shapes (as shown above), we will add 3 buttons and add the customization of each separately, lets say the buttons be - oval, rectangle and cylindrical. activity_main.xml
<?xml version="1.0" encoding="utf-8"?> <LinearLayout      xmlns:android="http://schemas.android.com/apk/res/android"     xmlns:app="http://schemas.android.com/apk/res-auto"     xmlns:tools="http://schemas.android.com/tools"     android:layout_width="match_parent"     android:layout_height="match_parent"     tools:context=".MainActivity"     android:orientation="vertical"     android:background="#ffff00">      <!-- 1st Button: Oval -->     <Button         android:layout_width="180dp"         android:layout_height="60dp"         android:layout_marginLeft="180dp"         android:layout_marginTop="20dp"         android:text="oval"         android:textColor="#388e3c"/>      <!-- 2nd Button: Rectangle -->     <Button        android:layout_width="180dp"        android:layout_height="60dp"        android:layout_marginLeft="180dp"        android:layout_marginTop="20dp"        android:text="rectangle"        android:textColor="#FFFF"/>      <!-- 3rd Button: Cylindrical -->     <Button        android:layout_width="180dp"        android:layout_height="60dp"        android:layout_marginLeft="180dp"        android:layout_marginTop="20dp"        android:text="cylindrical"        android:textColor="#3e2723"/>  </LinearLayout> 
Initially, all three buttons have default values and will look as per the default look shown above. Step 3: Customizing the button In order to customize the button, as shown above, we will be needing few attributes of Button in particular:
  1. shape: This defines the shape of the widget that is being used. For example: oval, rectangle, etc.
  2. color This attribute takes the Hexadecimal color code as parameter and sets the color as per the code
  3. corner::radius: This attribute defines how much curved corners of the button has to be. For example, no curve will lead to rectangle and increasing the curve can result in circle as well.
  4. stroke: This attribute refers to the thickness of the outline of the button. The more the stroke, the thicker the outline will be.
These attributes can be set for a widget with the help of a Drawable resource file.
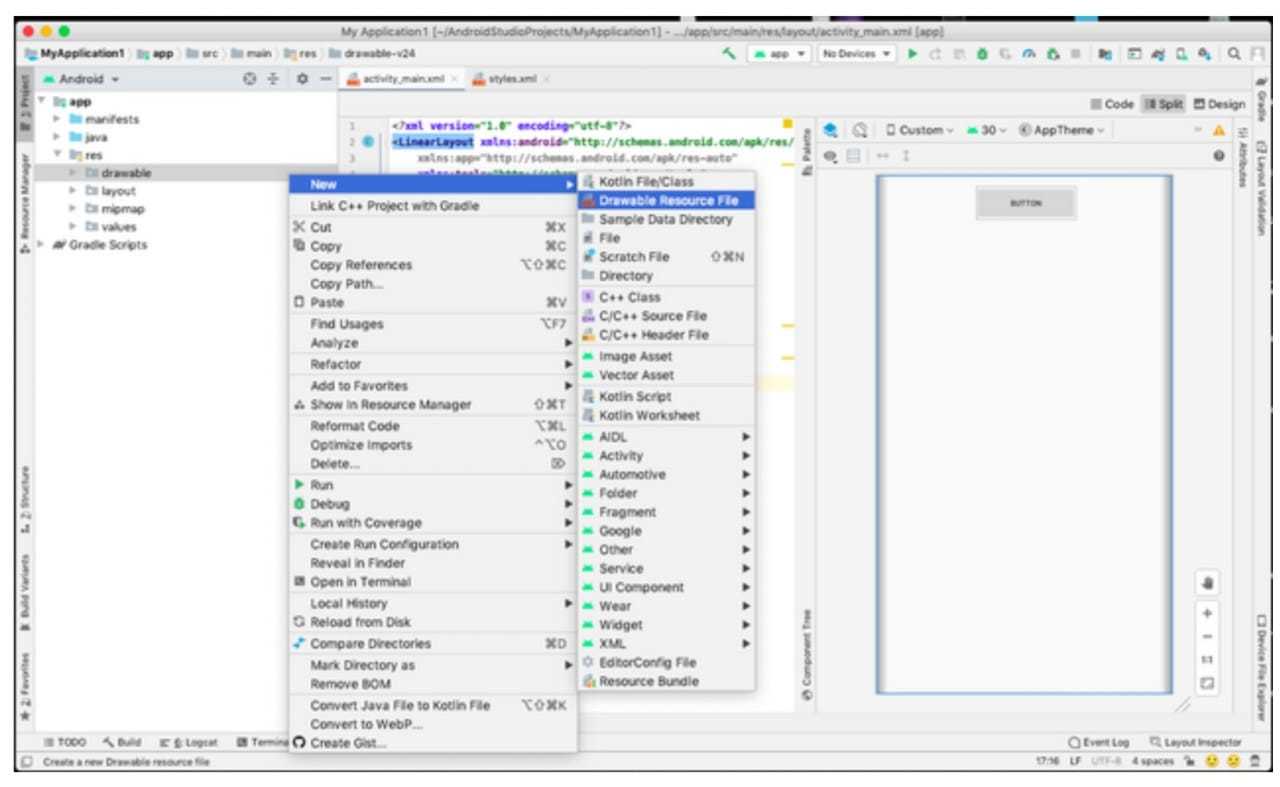
  1. Creating a new drawable resource file: We will be creating a new drawable file which will contain the customizations such as shape, color, and gradient which we want to set on our button. To create a drawable file, click on: app -> res -> drawable(right click) -> New -> Drawable resource file and name it anything you want. Creating a new drawable resource file
  2. Adding code to the resource file: Now that we have this drawable resource file, we can customize our button by adding tags like shape, color, stroke, or any other attribute which we want. custom_button.xml
    <?xml version="1.0" encoding="utf-8"?> <shape     xmlns:android="http://schemas.android.com/apk/res/android"     android:shape="oval" >      <stroke         android:color="#388e3c"         android:width="2dp"/>     <corners         android:radius="5dp"/>     <solid         android:color="#ffff"/> </shape> 
    custom_button2.xml
    <?xml version="1.0" encoding="utf-8"?> <shape      xmlns:android="http://schemas.android.com/apk/res/android"     android:shape="rectangle">     <stroke         android:color="@color/colorPrimary"         android:width="1dp"/>     <corners         android:radius="15dp"/>     <gradient         android:startColor="#2e7d32"         android:endColor="#e0f7fa"/> </shape> 
    custom_button3.xml
    <?xml version="1.0" encoding="utf-8"?> <shape     xmlns:android="http://schemas.android.com/apk/res/android"     android:shape="rectangle">      <stroke         android:color="@color/colorPrimary"          android:width="1dp"/>     <corners          android:radius="190dp"/>     <solid          android:color="#76ff03"/>     <gradient          android:startColor="#76ff03"/> </shape> 
  3. Adding these customizations to our original button: We can now add these customizations to the default button which we created previously. To do this, we just change the background attribute of our Button to the drawable resource file we just created.
    android:background="@drawable/custom_button"
This is how our activity_main.xml file will look now: activity_main.xml
<?xml version="1.0" encoding="utf-8"?> <LinearLayout      xmlns:android="http://schemas.android.com/apk/res/android"     xmlns:app="http://schemas.android.com/apk/res-auto"     xmlns:tools="http://schemas.android.com/tools"     android:layout_width="match_parent"     android:layout_height="match_parent"     tools:context=".MainActivity"     android:orientation="vertical"     android:background="#ffff00">      <!-- 1st Button: Oval -->     <Button         android:layout_width="180dp"         android:layout_height="60dp"         android:layout_marginLeft="180dp"         android:layout_marginTop="20dp"         android:text="oval"         android:textColor="#388e3c"         android:background="@drawable/custom_button"/>      <!-- 2nd Button: Rectangle -->     <Button        android:layout_width="180dp"        android:layout_height="60dp"        android:layout_marginLeft="180dp"        android:layout_marginTop="20dp"        android:text="rectangle"        android:textColor="#FFFF"        android:background="@drawable/custom_button2"/>      <!-- 3rd Button: Cylindrical -->     <Button        android:layout_width="180dp"        android:layout_height="60dp"        android:layout_marginLeft="180dp"        android:layout_marginTop="20dp"        android:text="cylindrical"        android:textColor="#3e2723"        android:background="@drawable/custom_button3"/>  </LinearLayout> 
Step 4: Running the project to see the output Output: output-ui

Next Article
How to create customized Buttons in Android with different shapes and colors

A

agarwalkeshav8399
Improve
Article Tags :
  • Write From Home
  • Android
  • Android-Button

Similar Reads

    How to Create Buttons Inside a Widget in Android?
    PrerequisitesHow to Create a Basic Widget of an Android App?How to Create a Dynamic Widget of an Android App?A Widget is a mini version of an Application, that provides a ground for the user to navigate through it or use its features from the Home Screen or Lock Screen. Widgets contain elements acco
    4 min read
    Create a Circular Button with an Icon in Android Jetpack Compose
    In Android, Buttons are the most basic and frequently used UI element that lets users call a function or start a task from the application context. It is provided to the user to give input to the application with the help of a click. These Buttons are largely customizable and visual attributes can b
    2 min read
    Android Jetpack Compose Button with Icon and Text
    Many times in android applications while using a button we have to display an image along with the text in our button. So that users will get to know about what the button actually does rather than simply displaying icons within the button. In this article, we will take a look at How to combine text
    2 min read
    How to Change Colors of a Floating Action Button in Android?
    Android applications use the Floating Action Button for prompting the user to perform some important action within the android application. Floating Action Buttons in android applications are used to perform some important functionality within android applications. Many times in the android applicat
    3 min read
    How to Change the Background Color of Button in Android using ColorStateList?
    ColorStateList is an object which can define in an XML file that can be used to apply different colors on widgets (such as Buttons , etc) depending on the state of Widgets to which it is being applied . For Example, There are many states of Buttons like (pressed, focussed, or none of them ) and othe
    4 min read
geeksforgeeks-footer-logo
Corporate & Communications Address:
A-143, 7th Floor, Sovereign Corporate Tower, Sector- 136, Noida, Uttar Pradesh (201305)
Registered Address:
K 061, Tower K, Gulshan Vivante Apartment, Sector 137, Noida, Gautam Buddh Nagar, Uttar Pradesh, 201305
GFG App on Play Store GFG App on App Store
Advertise with us
  • Company
  • About Us
  • Legal
  • Privacy Policy
  • In Media
  • Contact Us
  • Advertise with us
  • GFG Corporate Solution
  • Placement Training Program
  • Languages
  • Python
  • Java
  • C++
  • PHP
  • GoLang
  • SQL
  • R Language
  • Android Tutorial
  • Tutorials Archive
  • DSA
  • Data Structures
  • Algorithms
  • DSA for Beginners
  • Basic DSA Problems
  • DSA Roadmap
  • Top 100 DSA Interview Problems
  • DSA Roadmap by Sandeep Jain
  • All Cheat Sheets
  • Data Science & ML
  • Data Science With Python
  • Data Science For Beginner
  • Machine Learning
  • ML Maths
  • Data Visualisation
  • Pandas
  • NumPy
  • NLP
  • Deep Learning
  • Web Technologies
  • HTML
  • CSS
  • JavaScript
  • TypeScript
  • ReactJS
  • NextJS
  • Bootstrap
  • Web Design
  • Python Tutorial
  • Python Programming Examples
  • Python Projects
  • Python Tkinter
  • Python Web Scraping
  • OpenCV Tutorial
  • Python Interview Question
  • Django
  • Computer Science
  • Operating Systems
  • Computer Network
  • Database Management System
  • Software Engineering
  • Digital Logic Design
  • Engineering Maths
  • Software Development
  • Software Testing
  • DevOps
  • Git
  • Linux
  • AWS
  • Docker
  • Kubernetes
  • Azure
  • GCP
  • DevOps Roadmap
  • System Design
  • High Level Design
  • Low Level Design
  • UML Diagrams
  • Interview Guide
  • Design Patterns
  • OOAD
  • System Design Bootcamp
  • Interview Questions
  • Inteview Preparation
  • Competitive Programming
  • Top DS or Algo for CP
  • Company-Wise Recruitment Process
  • Company-Wise Preparation
  • Aptitude Preparation
  • Puzzles
  • School Subjects
  • Mathematics
  • Physics
  • Chemistry
  • Biology
  • Social Science
  • English Grammar
  • Commerce
  • World GK
  • GeeksforGeeks Videos
  • DSA
  • Python
  • Java
  • C++
  • Web Development
  • Data Science
  • CS Subjects
@GeeksforGeeks, Sanchhaya Education Private Limited, All rights reserved
We use cookies to ensure you have the best browsing experience on our website. By using our site, you acknowledge that you have read and understood our Cookie Policy & Privacy Policy
Lightbox
Improvement
Suggest Changes
Help us improve. Share your suggestions to enhance the article. Contribute your expertise and make a difference in the GeeksforGeeks portal.
geeksforgeeks-suggest-icon
Create Improvement
Enhance the article with your expertise. Contribute to the GeeksforGeeks community and help create better learning resources for all.
geeksforgeeks-improvement-icon
Suggest Changes
min 4 words, max Words Limit:1000

Thank You!

Your suggestions are valuable to us.

What kind of Experience do you want to share?

Interview Experiences
Admission Experiences
Career Journeys
Work Experiences
Campus Experiences
Competitive Exam Experiences