CustomArrayAdapter in Android with Example
Last Updated : 05 Feb, 2025
In Android, ArrayAdapters are used for populating and controlling the ListView and Spinners. ArrayAdapter by default provides List-Items that include only single information or single TextView. In order to have a more complex layout that includes multiple information in a single List-Item such as images, text, etc. we use CustomArrayAdapter. Apps like Instagram, WhatsApp, and many more are using such a complex layout.
Step by Step Implementation of CustomArrayAdapter
Step 1: Create a New Project
To create a new project in Android Studio please refer to How to Create/Start a New Project in Android Studio.
Step 2: Working with the activity_main.xml file
In this step, we will add a ListView to our activity_main.xml file which is used to show the data of list Items. Go to the app > res > layout > activity_main.xml and the following code snippet.
activity_main.xml:
XML <?xml version="1.0" encoding="utf-8"?> <androidx.constraintlayout.widget.ConstraintLayout xmlns:android="http://schemas.android.com/apk/res/android" xmlns:app="http://schemas.android.com/apk/res-auto" xmlns:tools="http://schemas.android.com/tools" android:layout_width="match_parent" android:layout_height="match_parent" tools:context=".MainActivity"> <ListView android:id="@+id/listView" android:layout_width="match_parent" android:layout_height="wrap_content" android:dividerHeight="1dp" app:layout_constraintEnd_toEndOf="parent" app:layout_constraintStart_toStartOf="parent" app:layout_constraintTop_toTopOf="parent" /> </androidx.constraintlayout.widget.ConstraintLayout>
Layout:

Step 3: Create a new layout file list_item.xml
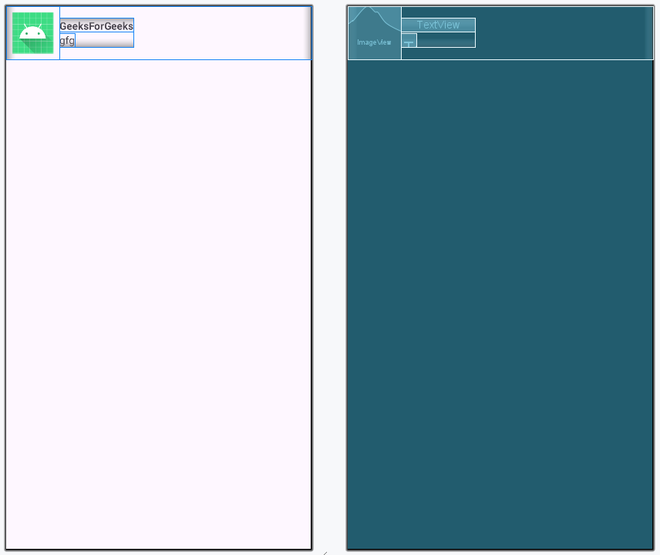
In this step, we will create a layout file for the single list item view. Go to app > res > layout > right-click > New > Layout Resource File and name it as list_item. list_item.xml contains an ImageView and a TextView which is used for populating the ListView.
list_item.xml:
XML <?xml version="1.0" encoding="utf-8"?> <LinearLayout xmlns:android="http://schemas.android.com/apk/res/android" android:layout_width="match_parent" android:layout_height="wrap_content" android:orientation="horizontal"> <!--For image src we have used ic_launcher and for text "GeeksForGeeks" and "gfg" they are used only for reference how it will looks"--> <ImageView android:id="@+id/androidVersionImage" android:layout_width="72dp" android:layout_height="72dp" android:padding="8dp" android:src="@mipmap/ic_launcher_round" /> <LinearLayout android:layout_width="wrap_content" android:layout_height="wrap_content" android:layout_gravity="center" android:orientation="vertical"> <TextView android:id="@+id/androidVersionName" android:layout_width="wrap_content" android:layout_height="wrap_content" android:text="GeeksForGeeks" android:textStyle="bold" /> <TextView android:id="@+id/androidVersionNumber" android:layout_width="wrap_content" android:layout_height="wrap_content" android:text="gfg" /> </LinearLayout> </LinearLayout>
Layout:
Step 4: Create a new Java/Kotlin class "Item"
We will create a new java/kotlin class and name it as Item. Go to app > java > package > right-click > create new java/kotlin class.
Item Class:
Java public class Item { private int androidVersionImage; private String androidVersionName; private String androidVersionNumber; // Constructor public Item(int androidVersionImage, String androidVersionName, String androidVersionNumber) { this.androidVersionImage = androidVersionImage; this.androidVersionName = androidVersionName; this.androidVersionNumber = androidVersionNumber; } // Getters and Setters method public int getAndroidVersionImage() { return androidVersionImage; } public void setAndroidVersionImage(int androidVersionImage) { this.androidVersionImage = androidVersionImage; } public String getAndroidVersionName() { return androidVersionName; } public void setAndroidVersionName(String androidVersionName) { this.androidVersionName = androidVersionName; } public String getAndroidVersionNumber() { return androidVersionNumber; } public void setAndroidVersionNumber(String androidVersionNumber) { this.androidVersionNumber = androidVersionNumber; } } package org.geeksforgeeks.demo class Item( var androidVersionImage: Int, var androidVersionName: String, var androidVersionNumber: String )
Step 5: Creating Adapter class
Now, we will create an Adapter class that acts as a bridge between the UI Component and the Data Source .i.e., androidVersionImage, androidVersionName, androidVersionNumber, and ListView. Go to the app > java > package > right-click and create a new java/kotlin class and name it as Adapter. Below is the code snippet is given for it.
Adapter Class:
Java import android.content.Context; import android.view.LayoutInflater; import android.view.View; import android.view.ViewGroup; import android.widget.ArrayAdapter; import android.widget.ImageView; import android.widget.TextView; import java.util.ArrayList; public class Adapter extends ArrayAdapter <Item> { ImageView imageView; TextView textView1, textView2; ArrayList <Item> androidVersionList = new ArrayList <>(); public Adapter(Context context, int textViewResourceId, ArrayList <Item> objects) { super(context, textViewResourceId, objects); androidVersionList = objects; } // Returns total number of items to be displayed in the list. // It counts the value from the arraylist size @Override public int getCount() { return super.getCount(); } // This function implicitly gets called when the listItem view is ready // to be displayed. Here we set the layout and add data to the views @Override public View getView(int position, View convertView, ViewGroup viewGroup) { View view = convertView; // Setting layout LayoutInflater layoutInflater = (LayoutInflater) getContext().getSystemService(Context.LAYOUT_INFLATER_SERVICE); view = layoutInflater.inflate(R.layout.list_item, null); imageView = (ImageView) view.findViewById(R.id.androidVersionImage); textView1 = (TextView) view.findViewById(R.id.androidVersionName); textView2 = (TextView) view.findViewById(R.id.androidVersionNumber); // Adding data to the Views imageView.setImageResource(androidVersionList.get(position).getAndroidVersionImage()); textView1.setText(androidVersionList.get(position).getAndroidVersionName()); textView2.setText(androidVersionList.get(position).getAndroidVersionNumber()); return view; } } package org.geeksforgeeks.demo import android.content.Context import android.view.LayoutInflater import android.view.View import android.view.ViewGroup import android.widget.ArrayAdapter import android.widget.ImageView import android.widget.TextView class Adapter(context: Context?, textViewResourceId: Int, objects: ArrayList<Item>) : ArrayAdapter<Item?>(context!!, textViewResourceId, objects as List<Item?>) { var imageView: ImageView? = null var textView1: TextView? = null var textView2: TextView? = null var androidVersionList: ArrayList<Item> = ArrayList() init { androidVersionList = objects } // Returns total number of items to be displayed in the list. // It counts the value from the arraylist size override fun getCount(): Int { return super.getCount() } // This function implicitly gets called when the listItem view is ready // to be displayed. Here we set the layout and add data to the views override fun getView(position: Int, convertView: View?, viewGroup: ViewGroup): View { var view = convertView // Setting layout val layoutInflater = context.getSystemService(Context.LAYOUT_INFLATER_SERVICE) as LayoutInflater view = layoutInflater.inflate(R.layout.list_item, null) imageView = view.findViewById<View>(R.id.androidVersionImage) as ImageView textView1 = view.findViewById<View>(R.id.androidVersionName) as TextView textView2 = view.findViewById<View>(R.id.androidVersionNumber) as TextView // Adding data to the Views imageView!!.setImageResource(androidVersionList[position].androidVersionImage) textView1!!.text = androidVersionList[position].androidVersionName textView2!!.text = androidVersionList[position].androidVersionNumber return view } }
Step 6: Working with the MainActivity file
In MainActivity class we create an ArrayList for storing images and texts. These images are placed in the drawable folder(app > res > drawable). You can use any images in place of this. We get the reference of listView and set the adapter on the listView.
MainActivity File:
Java import androidx.appcompat.app.AppCompatActivity; import android.os.Bundle; import android.widget.ListView; import java.util.ArrayList; public class MainActivity extends AppCompatActivity { ListView listView; ArrayList <Item> androidVersionList = new ArrayList <>(); @Override protected void onCreate(Bundle savedInstanceState) { super.onCreate(savedInstanceState); setContentView(R.layout.activity_main); // Getting the reference of listView listView = (ListView) findViewById(R.id.listView); // Adding image and texts to list androidVersionList.add(new Item(R.drawable.donut, "Donut", "1.6")); androidVersionList.add(new Item(R.drawable.eclair, "Eclair", "2.0 - 2.1")); androidVersionList.add(new Item(R.drawable.froyo, "Froyo", "2.2 - 2.2.3")); androidVersionList.add(new Item(R.drawable.gingerbread, "GingerBreak", "2.3 - 2.3.7")); androidVersionList.add(new Item(R.drawable.honeycomb, "HoneyComb", "3.0 - 3.2.6")); androidVersionList.add(new Item(R.drawable.icecream, "IceCream", "4.0 - 4.0.4")); androidVersionList.add(new Item(R.drawable.jellybean, "JellyBean", "4.1 - 4.3.1")); androidVersionList.add(new Item(R.drawable.kitkat, "KitKat", "4.4 - 4.4.4")); androidVersionList.add(new Item(R.drawable.lollipop, "Lollipop", "5.0 - 5.1.1")); androidVersionList.add(new Item(R.drawable.marshmallow, "Marshmallow", "6.0 - 6.0.1")); Adapter adapter = new Adapter(this, R.layout.list_item, androidVersionList); // Setting the adapter to list listView.setAdapter(adapter); } } package org.geeksforgeeks.demo import android.os.Bundle import android.widget.ListView import androidx.appcompat.app.AppCompatActivity class MainActivity : AppCompatActivity() { private lateinit var listView: ListView private var androidVersionList: ArrayList<Item> = ArrayList() override fun onCreate(savedInstanceState: Bundle?) { super.onCreate(savedInstanceState) setContentView(R.layout.activity_main) // Getting the reference of listView listView = findViewById(R.id.listView) // Adding image and texts to list androidVersionList.add(Item(R.mipmap.ic_launcher_round, "Donut", "1.6")) androidVersionList.add(Item(R.mipmap.ic_launcher_round, "Eclair", "2.0 - 2.1")) androidVersionList.add(Item(R.mipmap.ic_launcher_round, "Froyo", "2.2 - 2.2.3")) androidVersionList.add(Item(R.mipmap.ic_launcher_round, "GingerBreak", "2.3 - 2.3.7")) androidVersionList.add(Item(R.mipmap.ic_launcher_round, "HoneyComb", "3.0 - 3.2.6")) androidVersionList.add(Item(R.mipmap.ic_launcher_round, "IceCream", "4.0 - 4.0.4")) androidVersionList.add(Item(R.mipmap.ic_launcher_round, "JellyBean", "4.1 - 4.3.1")) androidVersionList.add(Item(R.mipmap.ic_launcher_round, "KitKat", "4.4 - 4.4.4")) androidVersionList.add(Item(R.mipmap.ic_launcher_round, "Lollipop", "5.0 - 5.1.1")) androidVersionList.add(Item(R.mipmap.ic_launcher_round, "Marshmallow", "6.0 - 6.0.1")) val adapter = Adapter(this, R.layout.list_item, androidVersionList) // Setting the adapter to list listView.adapter = adapter } } Output:

Similar Reads
ArrayAdapter in Android with Example The Adapter acts as a bridge between the UI Component and the Data Source. It converts data from the data sources into view items that can be displayed into the UI Component. Data Source can be Arrays, HashMap, Database, etc. and UI Components can be ListView, GridView, Spinner, etc. ArrayAdapter is
3 min read
BaseExpandableListAdapter in Android with Example The BaseExpandableListAdapter in Android is an abstract class used to create custom adapters for ExpandableListView, which displays a list of grouped items that can be expanded or collapsed. It provides methods to manage group and child views, define the count of groups and their children, and bind
10 min read
GridView Using Custom ArrayAdapter in Android with Example This article will be building an application to demonstrate the use of CustomArrayAdapters in GridView. GridViews are view containers that display views in two-dimensional (rows and columns) they are used in my android applications one simple example would be the gallery app. The adapter connects th
8 min read
Custom SimpleAdapter in Android with Example The Adapter acts as a bridge between the UI Component and the Data Source. It converts data from the data sources into view items that can be displayed into the UI Component. In Android, SimpleAdapter is an easy adapter to map static data to views defined in an XML (layout) file. You can specify the
8 min read
Custom ArrayAdapter with ListView in Android In the previous article ArrayAdapter in Android with Example, it's been discussed how the ArrayAdapter works and what are the data sources which can be attached to the ArrayAdapter with ListView. In this article, it's been discussed how to implement custom ArrayAdapter with the ListView. Have a look
7 min read