Custom SimpleAdapter in Android with Example
Last Updated : 07 Feb, 2025
The Adapter acts as a bridge between the UI Component and the Data Source. It converts data from the data sources into view items that can be displayed into the UI Component. In Android, SimpleAdapter is an easy adapter to map static data to views defined in an XML (layout) file. You can specify the data backing the list as an ArrayList of Maps. Each entry in the ArrayList corresponds to one row in the list. The Maps contain the data for each row.
Why use CustomSimpleAdapter?
SimpleAdapter allows us to add events to each list item but what if we want to add different events to different views that are part of our list item, we cannot achieve it by using SimpleAdapter itself. In a typical android application, a list item can consist of a complex layout that may contain different views. In that condition, we have to use customize SimpleAdapter. The basic syntax of SimpleAdapter.
Syntax:
class SimpleAdapter(
    context: Context,
    data: MutableList<HashMap<String, String>>,
    resource: Int,
    from: Array<String>,
    to: IntArray
)
Parameters:
- context: The context where the View associated with this SimpleAdapter is running
- data: A List of Maps. Each entry in the List corresponds to one row in the list. The Maps contain the data for each row, and should include all the entries specified in "from".
- resource: Resource identifier of a view layout that defines the views for this list item. The layout file should include at least those named views defined in "to".
- from: A list of column names that will be added to the Map associated with each item.
- to: The views that should display column in the "from" parameter. These should all be TextViews. The first N views in this list are given the values of the first N columns in the from parameter.
Two most important methods of SimpleAdapter:
- getCount(): How many items are in the data set represented by this Adapter.
- getView(): Get a view that displays the data at the specified position in the data set. You can either create a View manually or inflate it from an XML layout file. When the View is inflated, the parent View (GridView, ListView...) will apply default layout parameters unless you use LayoutInflater.inflate(int, android.view.ViewGroup, boolean) to specify a root view and to prevent attachment to the root.
Example
Below is the screenshot of the final application that we are going to create for this article. In this, you will notice that by clicking list_item nothing happens but when we click on Image then only Toast is displayed.
Step by Step Implementation
Step 1: Create a new Project
To create a new Project in Android Studio please refer to How to Create/Start a New Project in Android Studio.
We are going to use Java/Kotlin.
Step 2: Working with the activity_main.xml
Now open activity_main.xml and insert the below code in it. It will create a ConstraintLayout which consists of a ListView. Below is the code for the activity_main.xml file.
activity_main.xml:
XML <?xml version="1.0" encoding="utf-8"?> <androidx.constraintlayout.widget.ConstraintLayout xmlns:android="http://schemas.android.com/apk/res/android" xmlns:app="http://schemas.android.com/apk/res-auto" xmlns:tools="http://schemas.android.com/tools" android:layout_width="match_parent" android:layout_height="match_parent" android:background="@color/white" tools:context=".MainActivity"> <!-- This is the listView which will display our list_items --> <ListView android:id="@+id/listView" android:layout_width="match_parent" android:layout_height="match_parent" app:layout_constraintEnd_toEndOf="parent" app:layout_constraintStart_toStartOf="parent" app:layout_constraintTop_toTopOf="parent" /> </androidx.constraintlayout.widget.ConstraintLayout>
Layout:

Step 3: Creating a new layout XML file for List Item.
Go to the app > res > layout > right-click > New > Layout Resource File and creates a XML file. Name the file as list_item. Below is the code for the list_item.xml file.
list_item.xml:
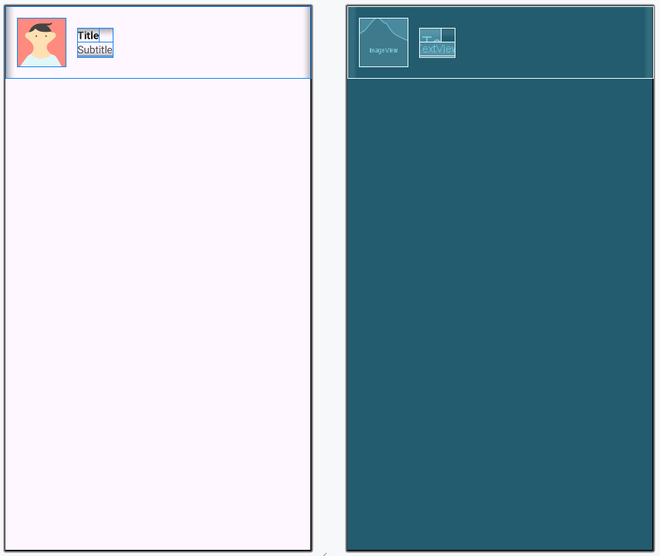
XML <?xml version="1.0" encoding="utf-8"?> <LinearLayout xmlns:android="http://schemas.android.com/apk/res/android" xmlns:tools="http://schemas.android.com/tools" android:id="@+id/mainLayout" android:layout_width="match_parent" android:layout_height="wrap_content" android:padding="16dp"> <!-- ImageView which is display to the left of list_item --> <ImageView android:id="@+id/avatarImageView" android:layout_width="65dp" android:layout_height="65dp" android:scaleType="fitCenter" android:clickable="true" android:focusable="true" tools:srcCompat="@tools:sample/avatars" /> <!-- LinearLayout to hold title and subtitle --> <LinearLayout android:layout_width="wrap_content" android:layout_height="wrap_content" android:layout_marginStart="16dp" android:layout_gravity="center" android:orientation="vertical"> <!-- TextView to display title --> <TextView android:id="@+id/titleTextView" android:layout_width="wrap_content" android:layout_height="wrap_content" android:textColor="@color/black" android:textStyle="bold" tools:text="Title" /> <!-- TextView to display subtitle --> <TextView android:id="@+id/subtitleTextView" android:layout_width="wrap_content" android:layout_height="wrap_content" android:ellipsize="end" tools:text="Subtitle" /> </LinearLayout> </LinearLayout>
Layout:
 frf
frf
Step 4: Implementing CustomSimpleAdapter
Now create a new Kotlin class file and name it CustomSimpleAdapter. In this file, we will override the getView() method to add the custom code. Below is the code for the CustomSimpleAdapter file. Comments are added inside the code to understand the code in more detail.
CustomSimpleAdapter File:
Java package com.gfg.custom_simple_adapter; import android.content.Context; import android.view.LayoutInflater; import android.view.View; import android.view.ViewGroup; import android.widget.ImageView; import android.widget.SimpleAdapter; import android.widget.TextView; import android.widget.Toast; import androidx.annotation.IdRes; import androidx.annotation.LayoutRes; import java.util.HashMap; import java.util.List; import java.util.Map; public class CustomSimpleAdapter extends SimpleAdapter { private final Context mContext; private final int mResource; private final String[] mFrom; private final int[] mTo; private final List<? extends Map<String, ?>> mData; public CustomSimpleAdapter(Context context, List<? extends Map<String, ?>> data, @LayoutRes int resource, String[] from, @IdRes int[] to) { super(context, data, resource, from, to); this.mContext = context; this.mData = data; this.mResource = resource; this.mFrom = from; this.mTo = to; } @Override public View getView(int position, View convertView, ViewGroup parent) { View view = convertView; if (view == null) { LayoutInflater inflater = (LayoutInflater) mContext.getSystemService(Context.LAYOUT_INFLATER_SERVICE); view = inflater.inflate(mResource, parent, false); } // Get the view in our case list_item.xml view = super.getView(position, view, parent); // Getting reference of ImageView that we // have used in our list_item.xml file // so that we can add user defined code ImageView avatarImageView = view.findViewById(R.id.avatarImageView); // Reference of TextView which is treated a title TextView titleTextView = view.findViewById(R.id.titleTextView); // Adding an clickEvent to the ImageView, as soon as we click this // ImageView we will see a Toast which will display a message // Note: this event will only fire when ImageView is pressed and // not when whole list_item is pressed avatarImageView.setOnClickListener(new View.OnClickListener() { @Override public void onClick(View v) { Toast.makeText( mContext, "Image with title " + titleTextView.getText() + " is pressed", Toast.LENGTH_SHORT ).show(); } }); // Finally returning our view return view; } } package org.geeksforgeeks.demo import android.content.Context import android.view.View import android.view.ViewGroup import android.widget.ImageView import android.widget.SimpleAdapter import android.widget.TextView import android.widget.Toast import androidx.annotation.IdRes import androidx.annotation.LayoutRes class CustomSimpleAdapter( private val mContext: Context, data: MutableList<HashMap<String, String>>, @LayoutRes res: Int, from: Array<String>, @IdRes to: IntArray ) : // Passing these params to SimpleAdapter SimpleAdapter(mContext, data, res, from, to) { override fun getView(position: Int, convertView: View?, parent: ViewGroup?): View { // Get the view in our case list_item.xml val view = super.getView(position, convertView, parent) // Getting reference of ImageView that we // have used in our list_item.xml file // so that we can add user defined code val avatarImageView = view.findViewById<ImageView>(R.id.avatarImageView) // Reference of TextView which is treated a title val titleTextView = view.findViewById<TextView>(R.id.titleTextView) // Adding an clickEvent to the ImageView, as soon as we click this // ImageView we will see a Toast which will display a message // Note: this event will only fire when ImageView is pressed and // not when whole list_item is pressed avatarImageView.setOnClickListener { Toast.makeText( mContext, "Image with title ${titleTextView.text} is pressed", Toast.LENGTH_SHORT ).show() } // Finally returning our view return view } }
Step 5: Working with the MainActivity file
Before writing any code in MainActivity file please add images that you want to show. Below is the code for MainActivity file. Comments are added inside the code to understand the code in more detail.
MainActivity File:
Java package com.gfg.custom_simple_adapter; import android.os.Bundle; import android.widget.ListView; import androidx.appcompat.app.AppCompatActivity; import java.util.ArrayList; import java.util.HashMap; import java.util.List; public class MainActivity extends AppCompatActivity { @Override protected void onCreate(Bundle savedInstanceState) { super.onCreate(savedInstanceState); setContentView(R.layout.activity_main); // Because SimpleAdapter works with static // data so we need to initialize static data // This is the array for TitleText String[] titles = {"Mountain", "Flower", "Sky"}; // This array is for SubtitleText String[] subtitles = {"This is a mountain", "This is a flower", "This is a beautiful sky"}; // These are the Id's of the images that will be displayed as avatar int[] images = {R.drawable.k1, R.drawable.k2, R.drawable.k3}; // Instantiating our data List, which is a list of HashMap List<HashMap<String, String>> data = new ArrayList<>(); // Populating our data List with the // arrays that we have already defined for (int i = 0; i < titles.length; i++) { HashMap<String, String> cur = new HashMap<>(); cur.put("titleText", titles[i]); cur.put("subtitleText", subtitles[i]); cur.put("avatarImage", String.valueOf(images[i])); data.add(cur); } // From and To array which will be used to map, HashMap values // to the Views that are defined in the XML file (in our case list_item.xml) String[] from = {"avatarImage", "titleText", "subtitleText"}; int[] to = {R.id.avatarImageView, R.id.titleTextView, R.id.subtitleTextView}; // Instantiating customSimpleAdapter with the above values CustomSimpleAdapter customSimpleAdapter = new CustomSimpleAdapter(this, data, R.layout.list_items, from, to); // Getting reference of listView which is defined in activity_main.xml ListView listView = findViewById(R.id.listView); // Finally, setting adapter to our customSimpleAdapter listView.setAdapter(customSimpleAdapter); } } package org.geeksforgeeks.demo import android.os.Bundle import android.widget.ListView import androidx.appcompat.app.AppCompatActivity class MainActivity : AppCompatActivity() { override fun onCreate(savedInstanceState: Bundle?) { super.onCreate(savedInstanceState) setContentView(R.layout.activity_main) // Because SimpleAdapter works with static // data so we need to initialize static data // This is the array for TitleText val titles = arrayOf("Mountain", "Flower", "Sky") // This array is for SubtitleText val subtitles= arrayOf("This is a mountain", "This is a flower", "This is a beautiful sky") // These are the Id's of the images that will be displayed as avatar val images = arrayOf(R.drawable.k1, R.drawable.k2, R.drawable.k3) // Instantiating our data List, which is a list of HashMap val data: MutableList<HashMap<String, String>> = mutableListOf() // Populating our data List with the // arrays that we have already defined for (i in titles.indices) { val cur: HashMap<String, String> = HashMap() cur["titleText"] = titles[i] cur["subtitleText"] = subtitles[i] cur["avatarImage"] = "${images[i]}" data.add(cur) } // From and To array which will be used to map, HashMap values // to the Views that are defined in the XML file (in our case list_item.xml) val from = arrayOf("avatarImage", "titleText", "subtitleText") val to = intArrayOf(R.id.avatarImageView, R.id.titleTextView, R.id.subtitleTextView) // Instantiating customSimpleAdapter with the above values val customSimpleAdapter = CustomSimpleAdapter(this, data, R.layout.list_item, from, to) // Getting reference of listView which is defined in activity_main.xml val listView = findViewById<ListView>(R.id.listView) // Finally, setting adapter to our customSimpleAdapter listView.adapter = customSimpleAdapter } } Output:
Similar Reads
SimpleAdapter in Android with Example In Android, whenever we want to bind some data which we get from any data source (e.g. ArrayList, HashMap, SQLite, etc.) with a UI component(e.g. ListView, GridView, etc.) then Adapter comes into the picture. Basically Adapter acts as a bridge between the UI component and data sources. Here Simple A
7 min read
SimpleExpandableListAdapter in Android with Example Android ExpandableListView is a view that shows items as a vertically scrolling two-level list. The basic difference with ListView is that it allows two levels of the display, which can be easily expanded and collapsed by touching to view and their respective children's items. To show the view, Expa
10 min read
Spinner in Android with Example Android Spinner is a view similar to the dropdown list which is used to select one option from the list of options. It provides an easy way to select one item from the list of items and it shows a dropdown list of all values when we click on it. The default value of the android spinner will be the c
4 min read
Jetpack LiveData in Android with Example Android Jetpack is a suite of libraries to help developers follow best practices, reduce boilerplate code, and write code that works consistently across Android versions and devices so that developers can focus on the code they care about. Here, we are going to implement Jetpack Live Data in Android
4 min read
TextView in Android with Example TextView is a simple widget that is seen in every android application. This widget is used to display simple text within the android application. We can add custom styling to the text that we have to show. In this article, we will take a look at How to create a simple Text View in an android applica
2 min read